Updated
Go to Planners in the sidebar.
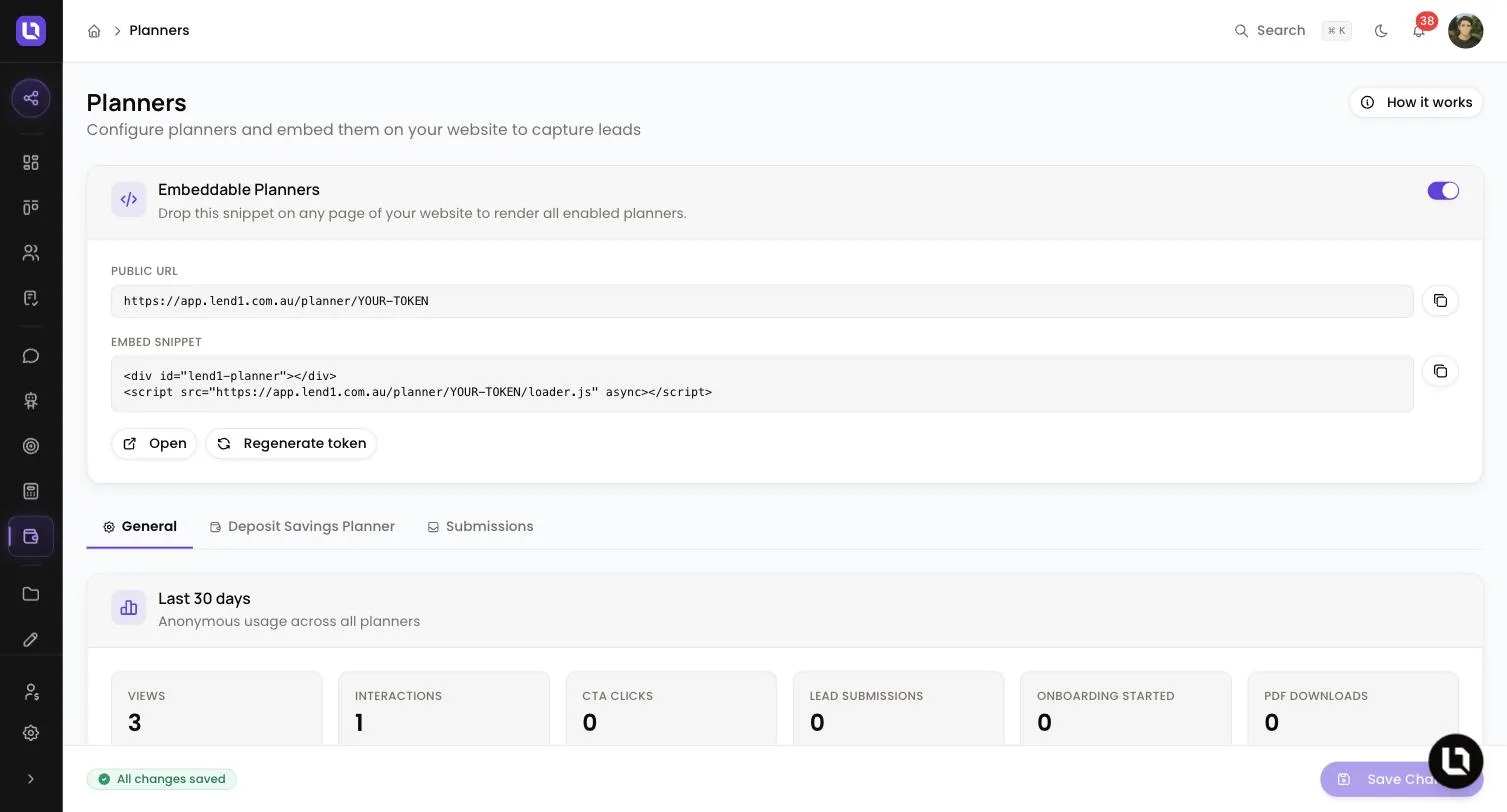
Lend1 comes with one ready-made planner, the Deposit Savings Planner. You don't build it: you adjust its wording and starting values, choose which buttons it shows, then paste a snippet into your website. A visitor enters a deposit goal, their income and their expenses, and sees an estimate of when they could reach it, in your brand colours and fonts.
Before you start
- You need the Manage Planners permission. An admin grants it under Settings > Roles & Permissions. See Creating custom roles and permissions.
- Planners are included in Pro and Enterprise. On Starter, Planners stays in the sidebar, dimmed, with a crown, and opens a page headed Included in Pro and Enterprise. See Managing your plan and billing.
- You need access to your website's HTML.
Planners in Lend1
Below is a table of planners and what each one works out.
| Planner | What it works out |
|---|---|
| Deposit Savings Planner | A date under "You could reach your goal by", from Goal Deposit, Currently Saved and the visitor's Income and Expenses rows. It also shows You can save, Time to goal, Saved so far and Still to save. |
Visitors edit the rows you prefill, and select Add income or Add expense for more. The result is an estimate from the visitor's own inputs. It does not include interest earned on savings.
Set up the planner
Step 1: Set the starting values
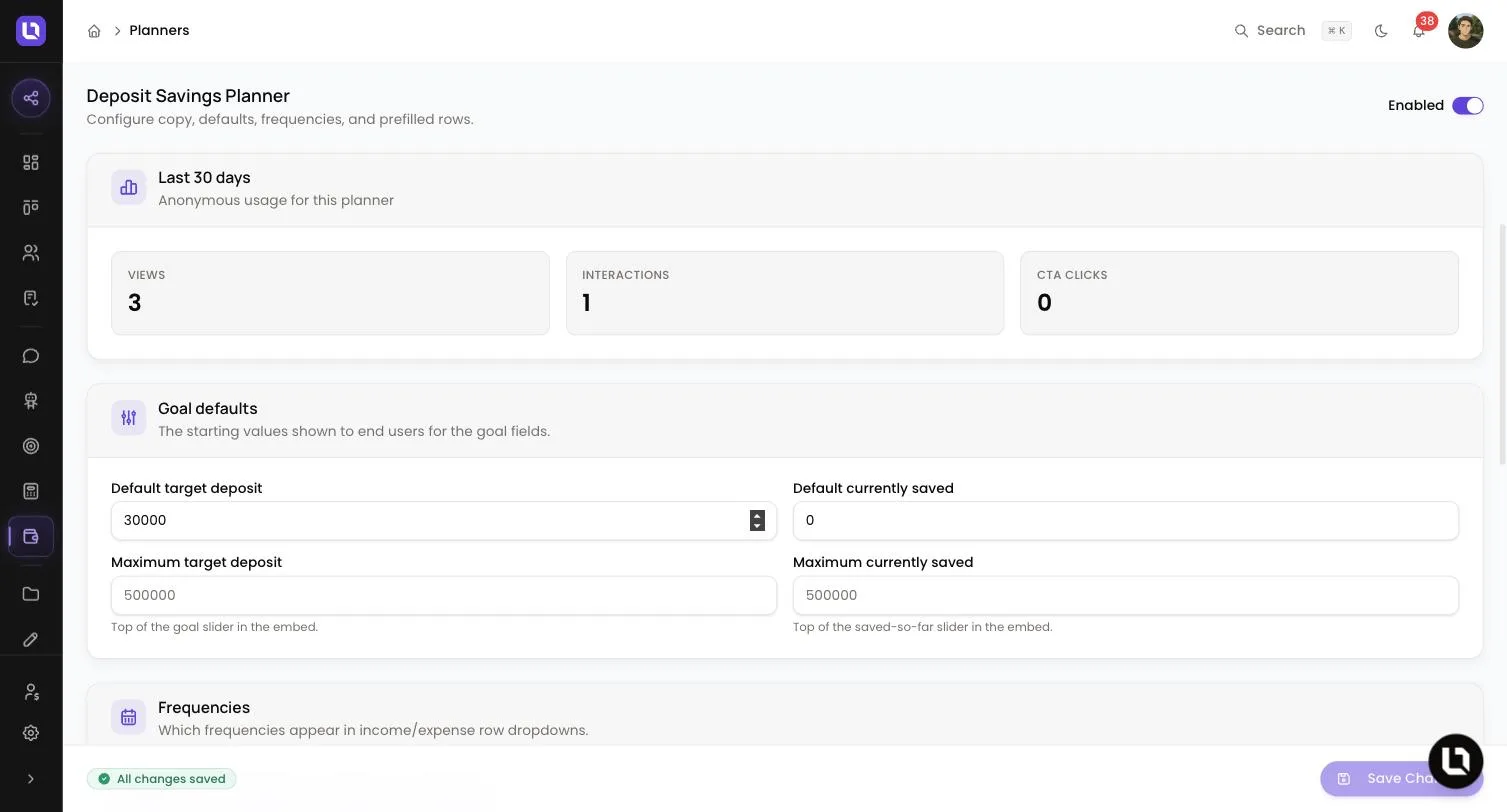
- Select the Deposit Savings Planner tab. Under Goal defaults, set Default target deposit, Default currently saved, Maximum target deposit and Maximum currently saved.
- Under Frequencies, choose which of Weekly, Fortnightly, Monthly and Annually visitors can pick on a row.
- Under Prefilled rows, edit the Income rows and Expense rows a visitor starts with, or select Add row.
Step 2: Set the wording
- Under Copy, edit Title, Subtitle and Disclaimer, then select Save Changes.
Please note: the disclaimer shows under the planner and on the PDF. The one that ships is "All figures are estimates. Speak to us for a personalised plan."
Choose how it captures leads
Select the General tab. Below is a table of options and what each one does. All three start switched off, and each adds a button under the visitor's results. Edit Button label and Helper text on each, then select Save Changes.
| Option | What the visitor does | What Lend1 does |
|---|---|---|
| Call to action | Selects your button (default "Speak to a broker"). | Opens your Destination URL. The button needs a URL. No contact is created. |
| Application invite | Selects "Start your application", enters Email, Name (optional) and Phone (optional), then selects Send my link. | Emails your onboarding invite, valid for 14 days, and shows "Check your email". |
| PDF Download | Selects "Download your plan now", enters First name, Last name, Email and Phone (optional), then selects Download my plan. | Downloads a branded PDF of their plan. |
The invite and the PDF handle the contact the way calculators do: an existing contact with that email only has its blank fields filled. Otherwise Lend1 creates a contact with the source Savings Planner, and the Contact Created automation trigger fires. See Embedding a calculator on your website.
See what a visitor entered
Only PDF Download keeps a visitor's answers.
- The Submissions tab lists each download with Date, Name, Email, Phone, Goal and Monthly savings.
- The PDF is saved to the contact's Documents tab under Financial Plan. It holds their goal, their income and expense rows, and your logo and disclaimer.
Please note: an application invite saves nothing the visitor entered, and their answers are not carried into the application. Neither path creates a deal, assigns the contact to a broker or notifies your team. Use a Contact Created automation if you want an alert or a task.
<!-- screenshot pending: planner-submissions-tab.webp (Submissions tab listing PDF downloads with Goal and Monthly savings) -->Embed it on your website
Step 1: Say which websites may show it
- On the General tab, under Allowed origins, enter one website address per line, such as
https://your-website.com.au, then select Save Changes. With none added, Lend1 uses your Business website from Settings > Organisation. A page on any other website can't load the planner.
Step 2: Copy the snippet
- On the Embeddable Planners card at the top of the page, select the copy button beside Embed snippet:
<div id="lend1-planner"></div>
<script src="https://app.lend1.com.au/planner/YOUR-TOKEN/loader.js" async></script>
Step 3: Paste it into your page
- In your website editor, add a block that accepts custom HTML where the planner should sit, paste both lines, then save and publish.
Please note: changes you save in Lend1 show on your website without pasting the snippet again. The switch on Embeddable Planners takes the planner off your website everywhere. Regenerate token stops every snippet already on your website from working until you replace it.
Check it is working
- Copy the Public URL and paste it into a new tab to preview it, then load your own page and move a slider. Please note: Open shows a blocked message, because the link is followed from inside Lend1. Copy the Public URL and paste it into a new tab instead. See Fixing an embed that won't show on your website.
- Last 30 days on the General tab counts Views, Interactions, CTA clicks, Onboarding started and PDF downloads.
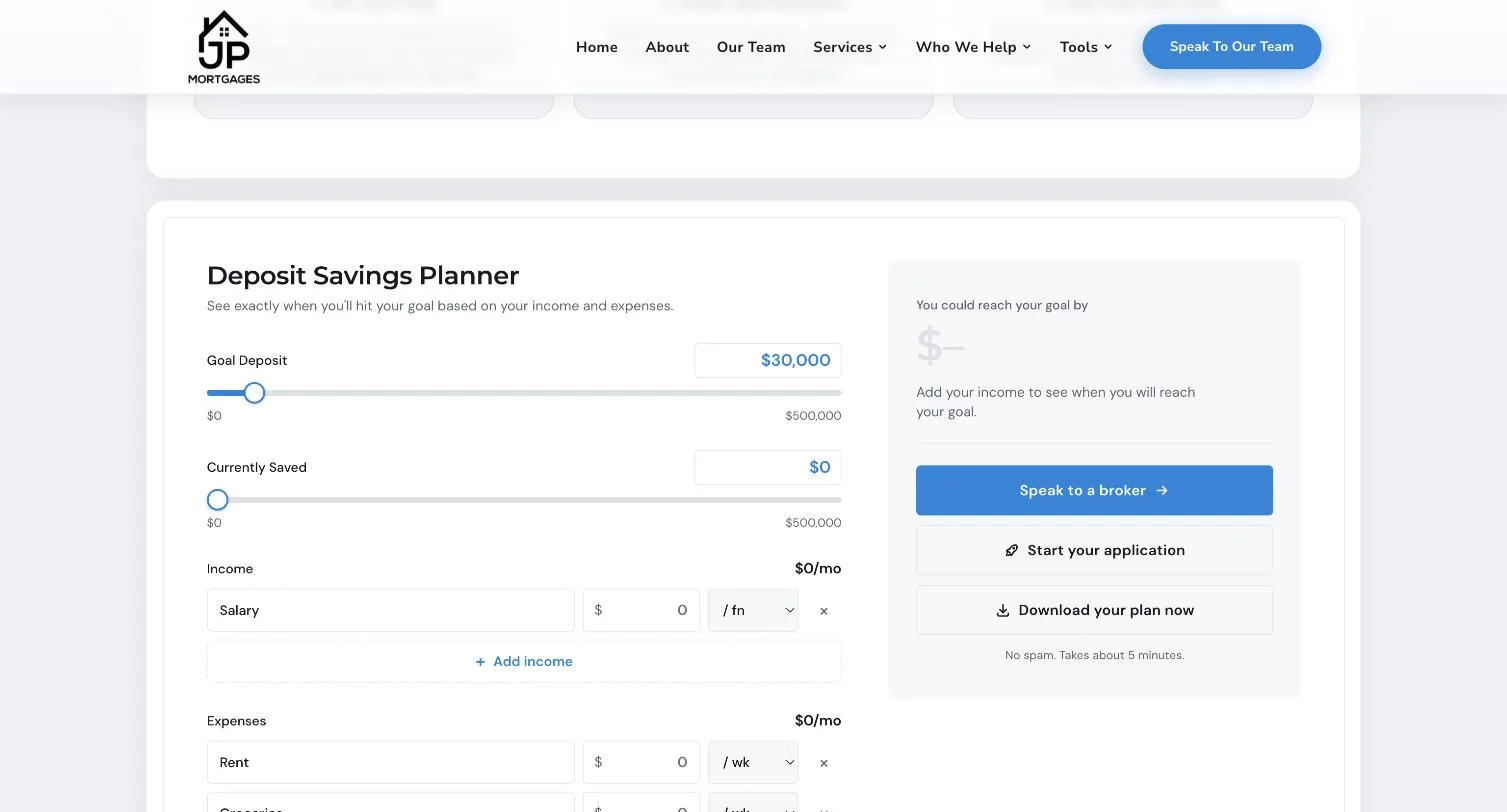
Congratulations! Your planner is live on your website.