Updated
Go to Deals in the sidebar, then select a deal's title on the board to open it.
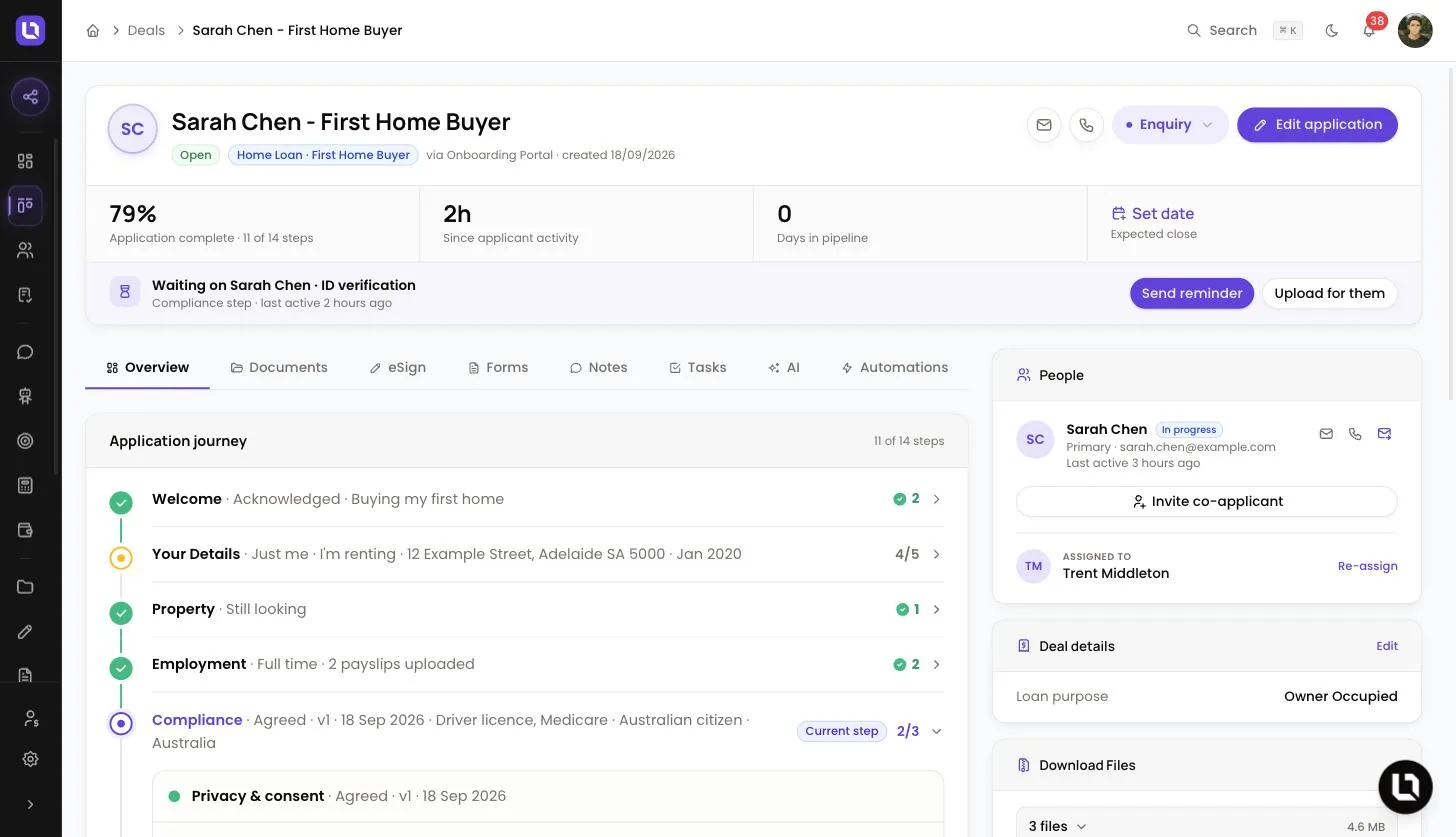
A deal is one client's application, and its page is where you work it from first contact to settlement: who is on it, what they have completed, the documents, notes and tasks attached to it, and where it sits in your pipeline. Lend1 uses the word application for the same record, which is why the buttons read New application and Edit application.
Before you start
- You need the View Deals permission to see Deals in the sidebar. It shows the deals assigned to you. View All Deals adds everyone else's.
- Creating a deal needs Create Deals. Editing one, inviting a co-applicant or reassigning it needs Edit Deals or Update Deals. Changing the stage needs one of those two or Change Deal Stage.
- The Admin role has full access, and the default Broker and Support roles hold every permission above except View All Deals. If an action is refused, ask an admin to grant you the permission under Settings > Roles & Permissions. See Creating custom roles and permissions.
Create a deal
Step 1: Open the form
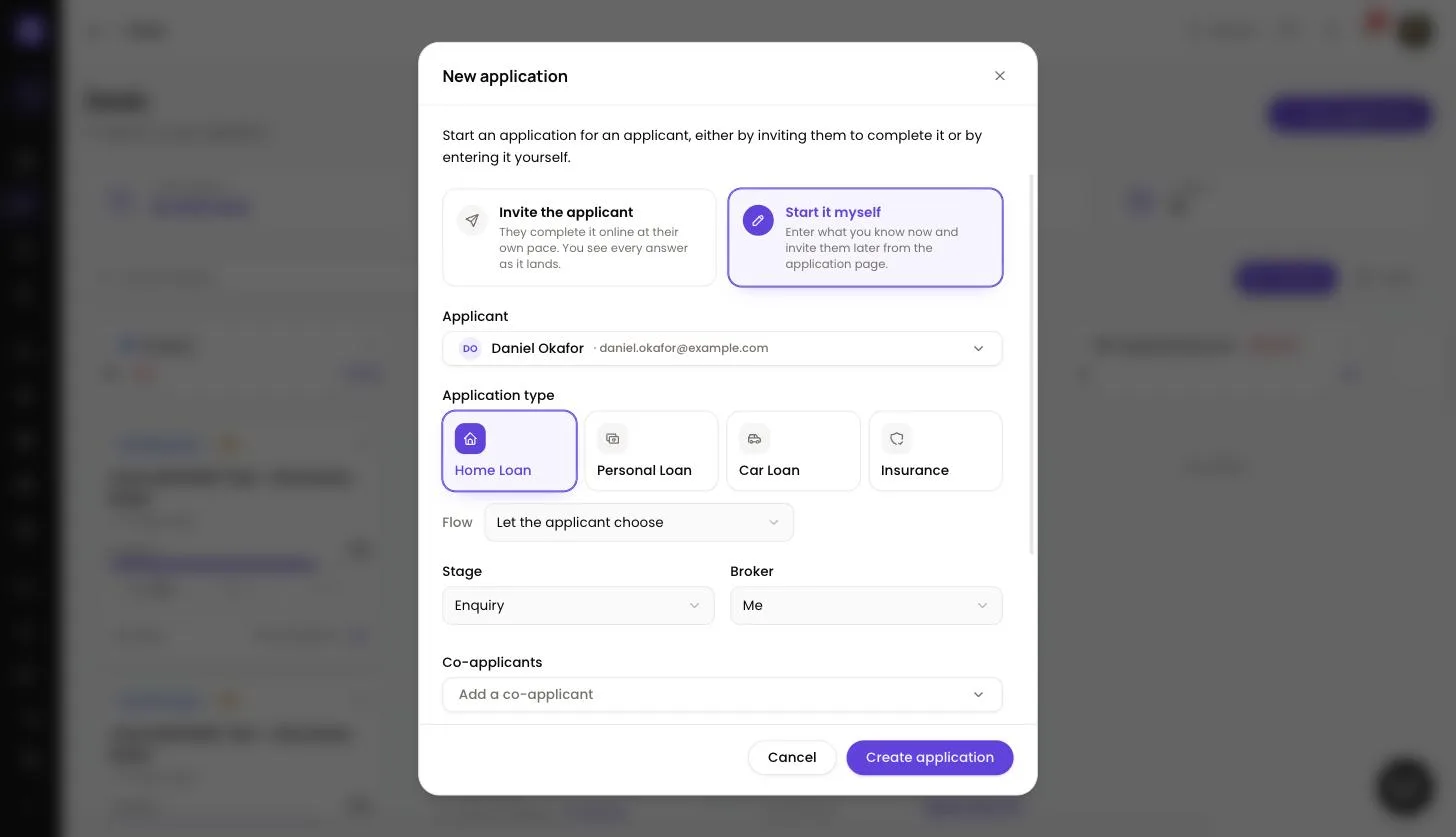
- On the Deals page, select New application.
Step 2: Choose how to start
- Invite the applicant: the client completes the application online and you see their answers as they land. Pick Send via Email or SMS.
- Start it myself: you enter what you know now and invite the client later from the deal page. This option adds Stage, Co-applicants, Expected close, Note and an optional Add loan details section.
Step 3: Fill in the details
- Applicant: search for an existing contact, or select Add new applicant to create one.
- Application type: the types listed are the ones switched on in your Onboarding Portal. If a type has more than one flow, a Flow dropdown appears, with Let the applicant choose as an option.
- Broker: who the deal is assigned to. It defaults to you.
Step 4: Save
- Select Send invite or Create application. The deal appears on the board.
Please note: your plan sets a limit on active deals. At the limit, New application opens Clean up active deals so you can close deals you've finished with. See Creating a deal and using the pipeline board.
Open a deal
- In the Kanban view, select the deal's title on its card.
- In the Table view, select the title, or open the row's menu and select View Details.
The layout of the deal page
The header shows the deal's title, its status badge (Open, On Hold, Won or Lost), the application type and the date it was created. On the right are Send email and Call shortcuts for the primary contact, the stage dropdown and Edit application.
Under the header, four figures summarise the file: how complete the application is, the time since the applicant was last active, Days in pipeline and Expected close. Select the Expected close date (or Set date) to change it from a calendar.
Below is a table of tabs and what each one is for.
| Tab | What it is for |
|---|---|
| Overview | The Application journey, a preview of pending Tasks, Recent Notes and the Recent Activity timeline for the deal. |
| Documents | Request, upload, approve and reject the client's documents. A number on the tab counts the documents still outstanding. |
| eSign | Create and track eSign requests. The number counts documents not yet signed. |
| Forms | Assign forms to the deal with Assign Form and follow their progress. |
| Notes | Every note on the deal. |
| Tasks | Every task on the deal, filtered by All, Pending, Completed or Overdue. |
| AI | The lead score, AI insights and the AI Probability Estimate. |
| Automations | Automation History for the deal. |
The panel on the right stays in place on every tab. It holds the People card, Deal details (the loan figures you entered, shown once at least one is filled in), Download Files, AI Insights and Integrations.
Borrowers and co-borrowers
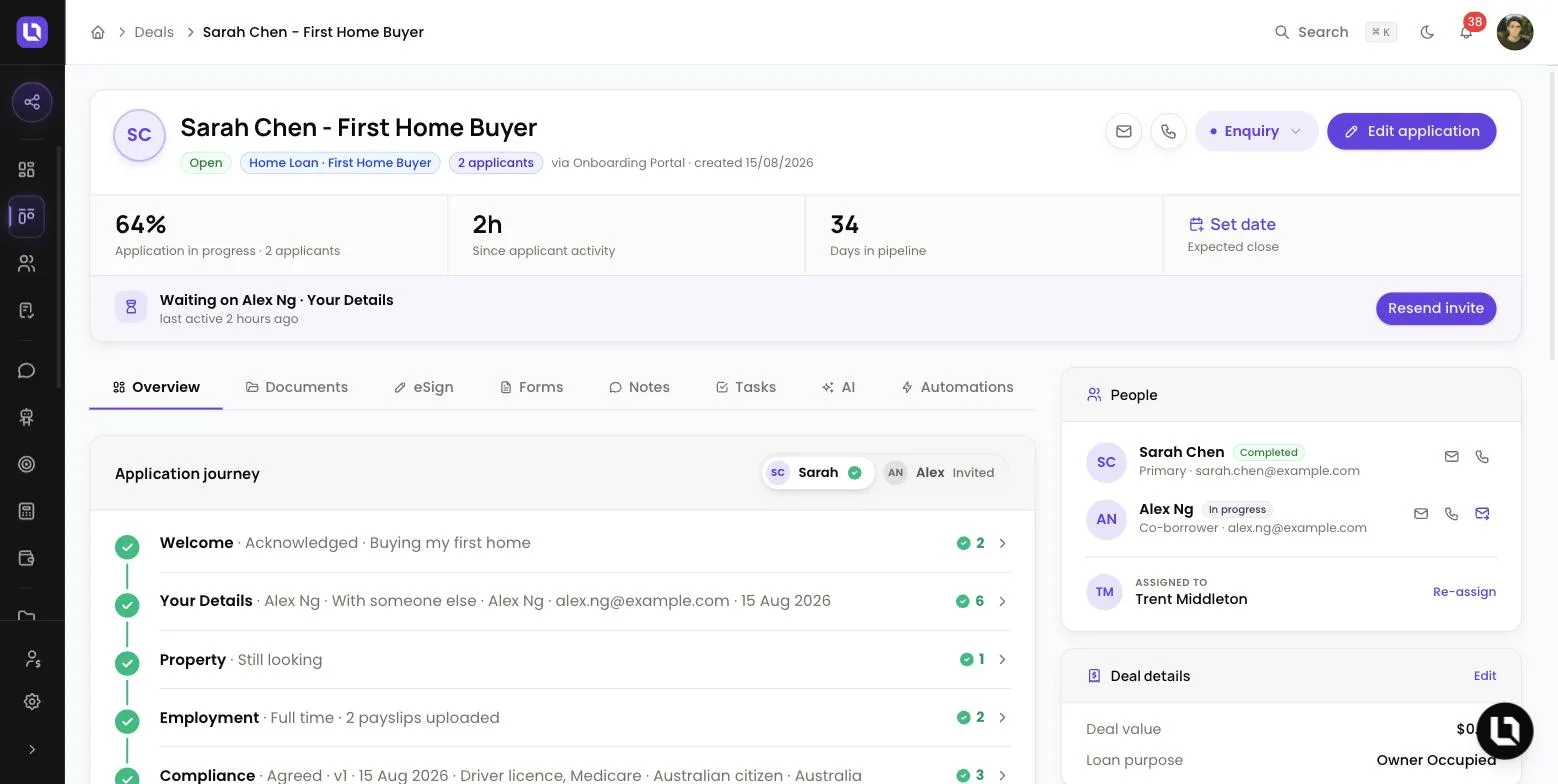
The People card lists the primary applicant first, then anyone added as a Co-borrower or Guarantor. Select a name to open that contact. Each person who has been invited carries a status: Invited, In progress, Completed, Expired or Abandoned.
Step 1: Invite a co-applicant
- On the People card, select Invite co-applicant. The button shows while the deal has no co-borrower.
Step 2: Enter their details
- Name: their full name.
- Email: where the invite is sent.
- Phone (optional): their mobile number.
Step 3: Send
- Select Send invite. They receive an email with a link to complete their part of the application.
To add an existing contact as a co-borrower instead, select Edit application and use Co-applicants.
Notes, documents and tasks
- Notes: open the Notes tab, select Add Note, write the note and select Save Note. Edit or delete a note from its menu. Please note: the Private note tick box has no effect yet, so treat every note as visible to anyone on your team who can open the deal. See Adding notes to deals and contacts.
- Documents: open the Documents tab and use Request Documents to build the client's checklist, or Upload Document to add a file yourself. Uploaded files are reviewed with Approve and Reject.
- Tasks: open the Tasks tab and select Add Task. Title is required. Assign To defaults to the person the deal is assigned to.
Assign an owner
- At the bottom of the People card, under Assigned to, select Re-assign (or Assign when the deal is unassigned).
- In Assign Deal, search for a team member, select them, then select Assign.
Please note: a team member with View Deals but not View All Deals works from the deals assigned to them, so assigning the deal is what puts it on their board.
Move the stage and close the deal
Step 1: Pick the new stage
- Select the stage dropdown in the header, beside Edit application, and choose a stage.
Step 2: Confirm any automations
- If the move triggers an automation, Lend1 shows Automation will be triggered and lists each one by name. Select Confirm to go ahead.
Step 3: Close with an outcome
- There is no separate close button. To close a deal, move it into a stage whose outcome is Settled or Inactive. The status badge changes to Won or Lost. Moving it back into a stage with the Active outcome reopens it.
Congratulations! You can run a deal from first invite to settlement without leaving its page.