Updated
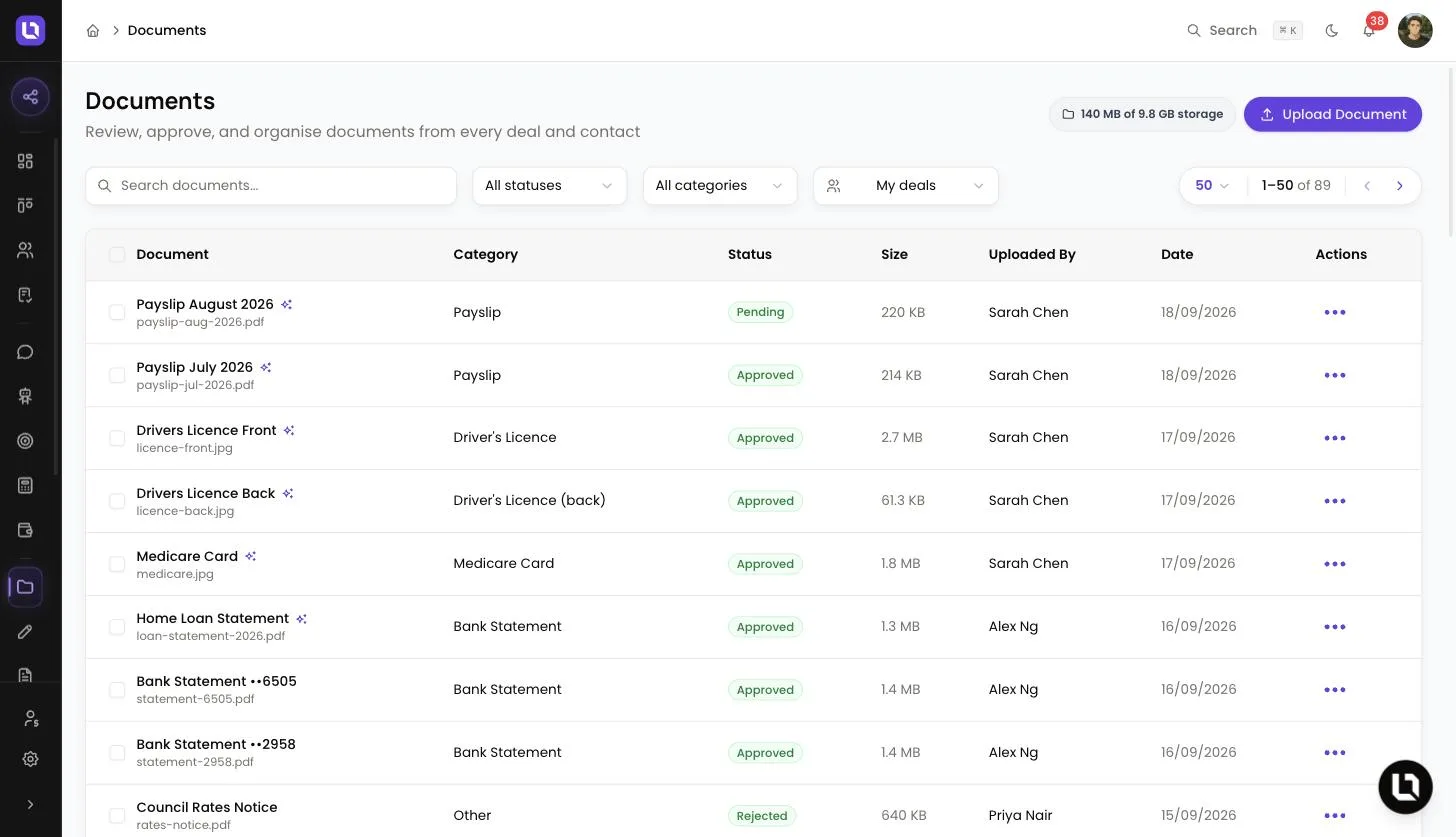
Go to Documents in the sidebar, or open a deal and select its Documents tab.
Every file a client or team member uploads lands in one place. The Documents page lists documents from every deal and contact so you can review them in bulk, while the Documents tab on a deal is where you ask a client for what is still missing and track it until it arrives.
Before you start
- The Documents page needs the View Documents permission. If you don't see it in the sidebar, ask an admin to grant it under Settings > Roles & Permissions. See Creating custom roles and permissions.
- You see documents on the deals you can access. The Admin role, or a custom role granted View All Documents, also sees documents on deals assigned to other people, and gets a filter for My deals, Unassigned deals and each broker.
- A request email goes to the deal's primary contact, so that contact needs an email address.
How documents arrive
- Onboarding. Clients upload ID, payslips and other files as they work through your onboarding portal. Each upload step accepts PDF, JPG, PNG and WEBP files up to 10MB.
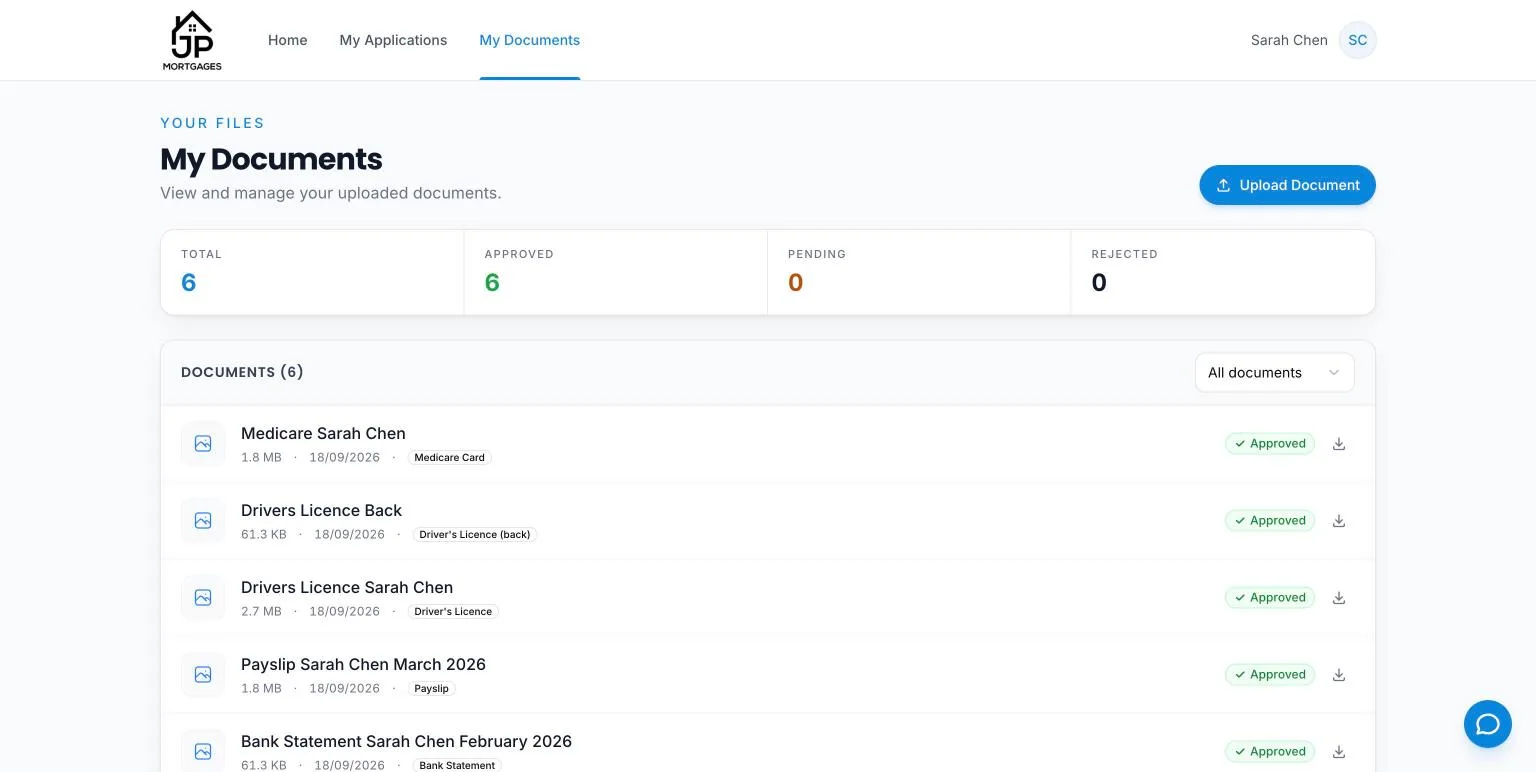
- Client portal. Signed-in clients upload from My Documents or from their application page. The portal accepts PDF, images, Word and Excel files up to 20MB.
- Your team. Select Upload Document on the Documents page, or on a deal's Documents tab. Staff uploads accept PDF, JPG, PNG, DOC, DOCX, XLS and XLSX files up to 20MB. On the Documents page you can also set a Name (optional), a Category, and link the file to a Contact (optional) or Deal (optional).
A document a client or team member uploads starts with the status Pending, unless Lend1 AI approves it automatically. See Reviewing, approving and rejecting client documents. When a document is added to a deal, Lend1 sends an in-app notification to the deal's assigned broker and their active support staff. If the deal is unassigned, the notification goes to everyone who can view all deals instead.
Request documents from a client
Step 1: Open the request form
- Open the deal and select the Documents tab.
- Select the Actions menu (the three dots) at the top right of the tab, then Request Documents.
Step 2: Build the list
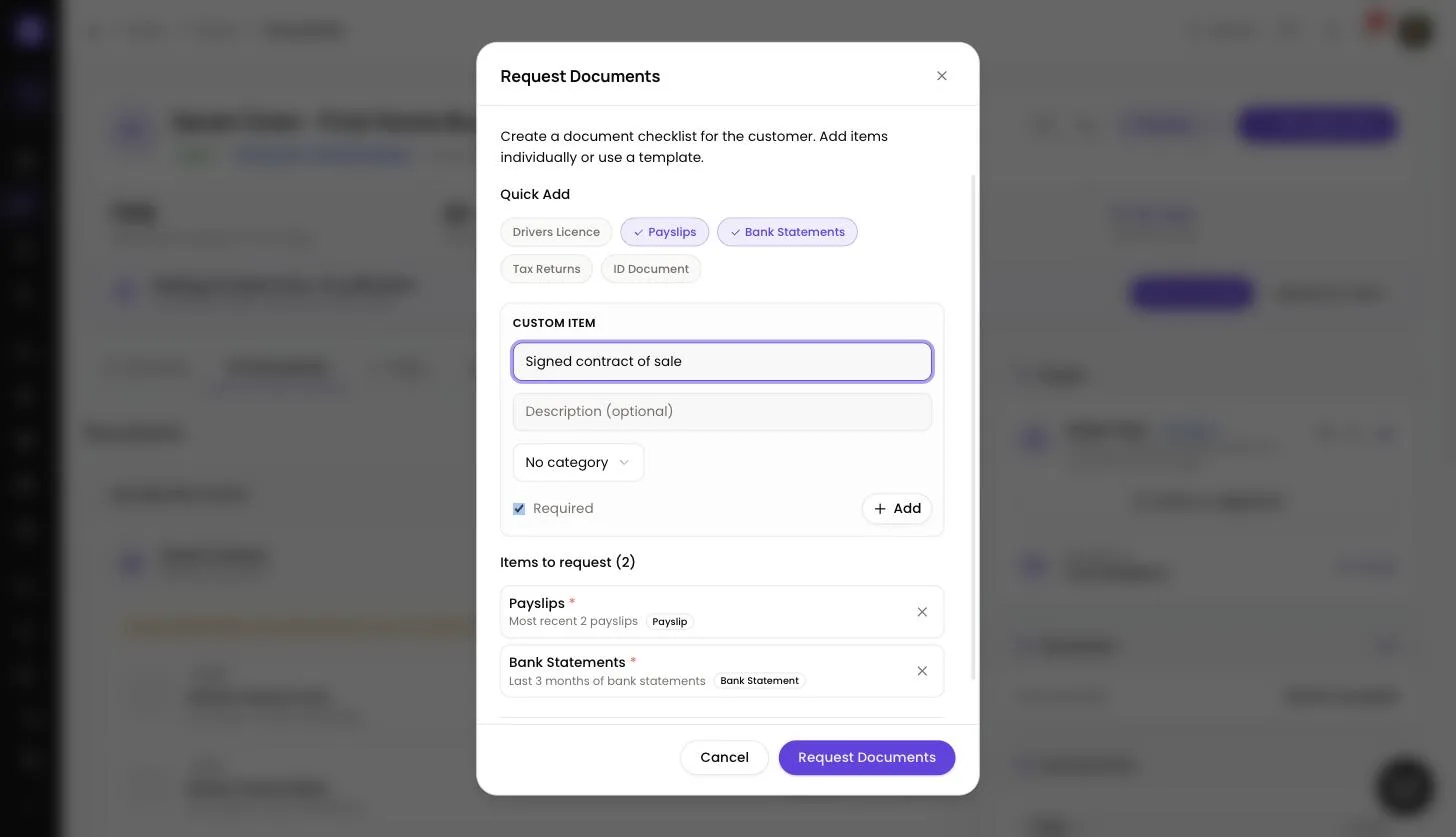
- Under Quick Add, select any of the presets: Drivers Licence, Payslips, Bank Statements, Tax Returns or ID Document.
- Under Custom Item, enter a Document name, an optional description and an optional document type, tick Required if the deal can't proceed without it, then select Add.
- Everything you add appears under Items to request.
Step 3: Send the request
- Leave Email customer with magic link to upload these documents ticked to email the primary contact, and every co-applicant on the deal who has an email address, a list of what you need and a secure link into their portal.
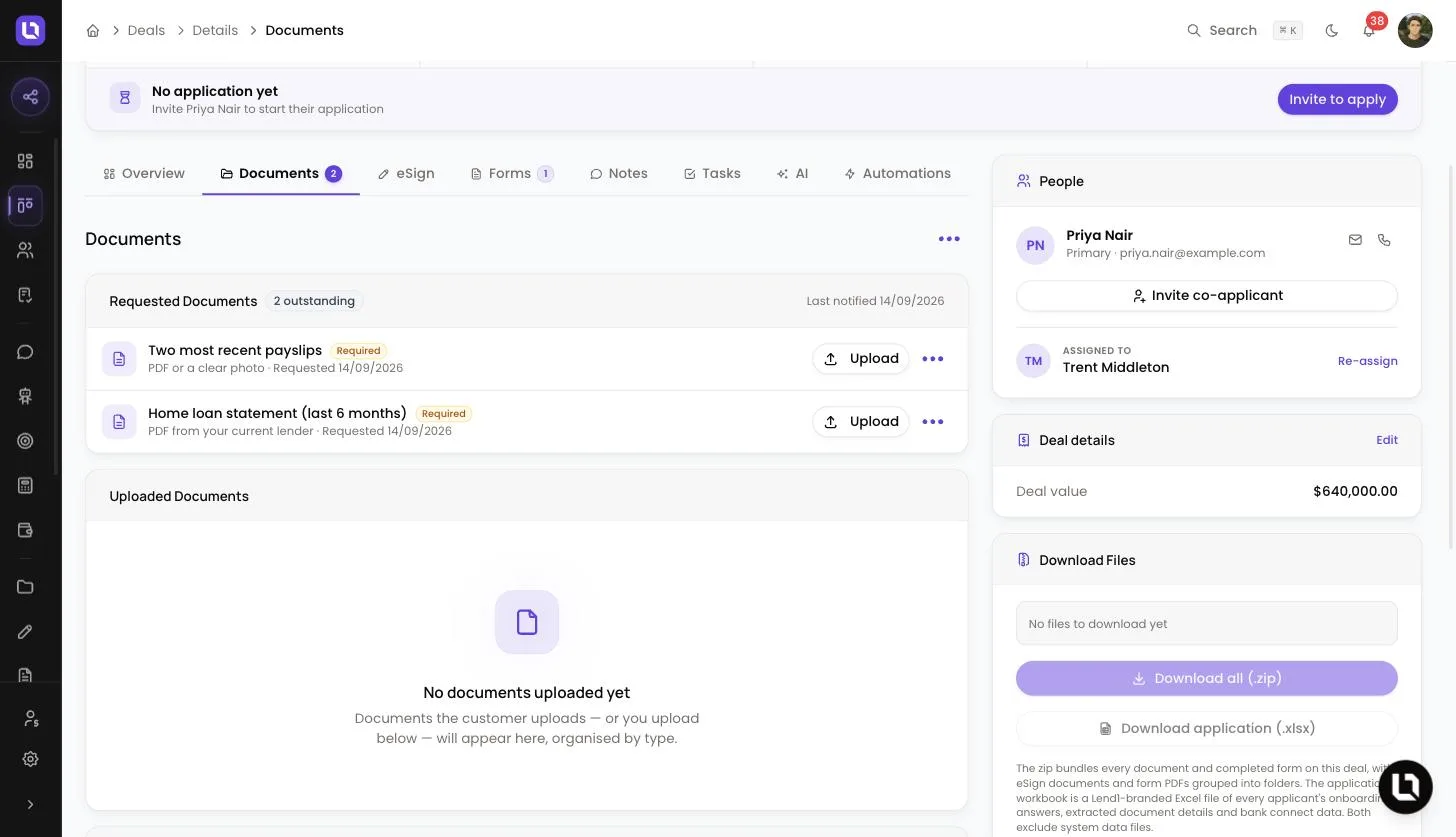
- Select Request Documents. The items appear in the Requested Documents card with a count of how many are outstanding.
Please note: if the primary contact has no email address, the request is still saved on the deal and Lend1 tells you the email could not be sent.
Congratulations! Your client has their list. As they upload, each file moves into Uploaded Documents on the same tab.
Add to a request or send a reminder
Once a deal has requested documents, the same Actions menu changes:
- Request Document: add one more document to the list. Tick Notify customer to email the primary contact a secure link for it.
- Notify Customer: email the client a summary of everything still outstanding, including any rejected documents that need re-uploading. The card then shows Last notified with the date.
- Remove All Requests: clear the request list. Uploaded documents are not deleted.
Each requested item has its own menu with Edit Request and Remove Request, and an Upload button for when the client sends you the file another way.
Review, approve and reject
Select a document to preview it. While it is Pending, select Approve to accept it, or Reject to send it back.
Rejecting asks for a Reason. On a deal, the client receives an email with that reason and a link to upload a replacement. Turn on Request a replacement to put the document back on the client's outstanding list so you can track it. That switch doesn't send a second email.
Below is a table of statuses and what each one means.
| Status | What it means |
|---|---|
| Pending | Uploaded and waiting for your review. |
| Approved | Reviewed and accepted. |
| Rejected | Sent back with a reason. |
Categories
You can choose a category when you upload a document or request one. The list covers identity (Driver's Licence, Passport, Medicare Card, Birth Certificate), income (Payslip, Income Statement, Tax Return, Employment Letter), Bank Statement, Proof of Address, Loan Statement, Insurance, Contract, Application Form, Credit Report, Financial Plan and Other.
On the Documents page, narrow the list with the All statuses and All categories filters, or the Search documents... box.
View and download
On the Documents page, each row's menu offers View, Approve, Reject, View Deal, Rename, Download and History. On a deal, the row menu offers Download, Rename and Delete, and the Download Files card in the deal sidebar has Download all (.zip) for the whole file.
Signing and renaming are separate features. eSign in the sidebar sends documents to clients for signature. Doc Renamer in the sidebar sets the naming rules Lend1 AI applies to uploaded documents: see Automatic document naming with Doc Renamer.
What your client sees
Their application page shows a notice that reads "Your broker has requested a document" (or the number requested), and lists each item in its Documents section with an uploader.
My Documents shows every file they have uploaded with counts for Total, Approved, Pending and Rejected. A rejected document shows your reason, so they know what to fix before uploading again.