Updated
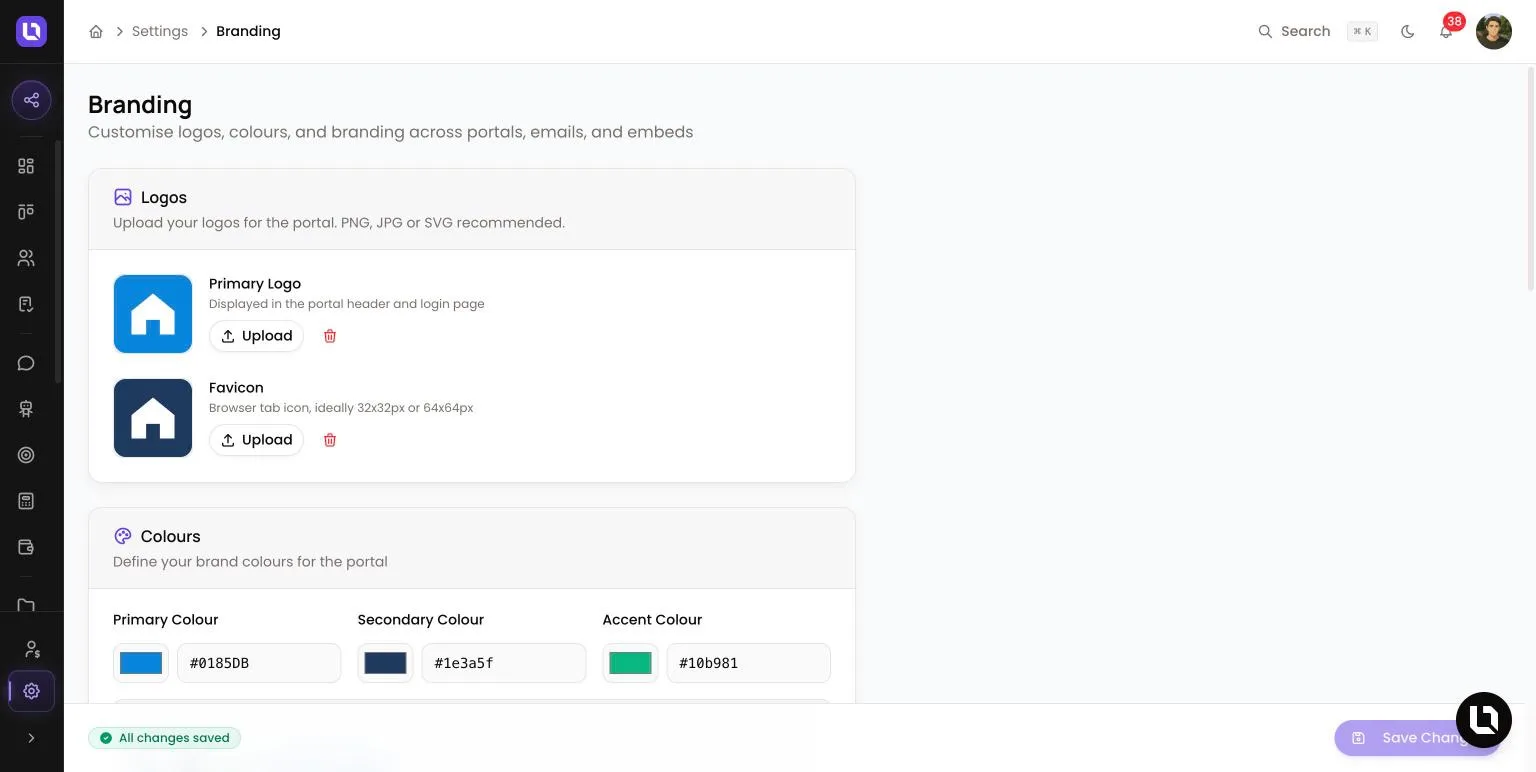
Go to Settings > Branding.
Branding sets your logo, colours, fonts and portal wording. The Domains page, in the same Workspace group of Settings, lets your client portal run on your own web address.
Before you start
- Both pages are available to the Admin role, or a custom role granted Manage Branding. That one permission covers Branding and Domains. If you don't see them in Settings, ask an admin to grant you that access under Settings > Roles & Permissions. See Creating custom roles and permissions.
- Branding and custom domains are not tied to a plan entitlement.
- For a custom domain you need access to your DNS provider so you can add a CNAME record.
Set your branding
Step 1: Upload your logos
- Under Logos, select Upload beside Primary Logo. It is displayed in the portal header and login page.
- Select Upload beside Favicon for the browser tab icon, ideally 32x32px or 64x64px.
- Logos save as soon as they upload.
Please note: uploads must be a JPEG, PNG, GIF or WebP image of 2 MB or less. The card mentions SVG, but SVG files are not accepted.
Step 2: Choose your colours and fonts
- Primary Colour, Secondary Colour and Accent Colour: use the colour picker or type a six-digit hex code such as
#6742E4. The Preview row shows the three colours and a Sample Button. - Body Font and Heading Font: pick from the list. Font Preview shows both.
- Border Radius: a CSS value such as
8px,0.5remor0. It controls corner rounding across the client portal.
Step 3: Set your portal wording
- Welcome Text: up to 1,000 characters. Please note: the client portal doesn't display this text yet, so filling it in has no visible effect.
- Login Text: shown as the subtitle on the login page. Up to 500 characters.
- Show "Powered by Lend1": switch off to hide the Lend1 attribution in the portal footer.
- Custom CSS: optional styles scoped to the client portal, using the
.customer-portalclass as a parent selector.@import,expression(),javascript:and remote or dataurl()values are rejected.
Step 4: Save
- The bar at the bottom of the page shows Unsaved changes. Select Save Changes, or Discard to drop your edits.
Congratulations! Your branding is live.
Where your branding appears
Below is a table of the places Lend1 applies your branding and what each one uses.
| Place | What it uses |
|---|---|
| Client portal | Logo, favicon, colours, fonts, border radius, portal wording and custom CSS, including the login page, your Onboarding Portal and the eSign signing page. |
| Emails | Logo, primary and secondary colours, and the "Powered by Lend1" setting. |
| Hosted forms | Your branding on the direct link page for a form. |
| Calculators and planners | Colours and font. |
| Lead widget | Logo and primary colour. |
| Referrer portal | Logo, favicon, primary colour and fonts. |
| Form submission PDFs | Logo and primary colour. |
Add a custom domain
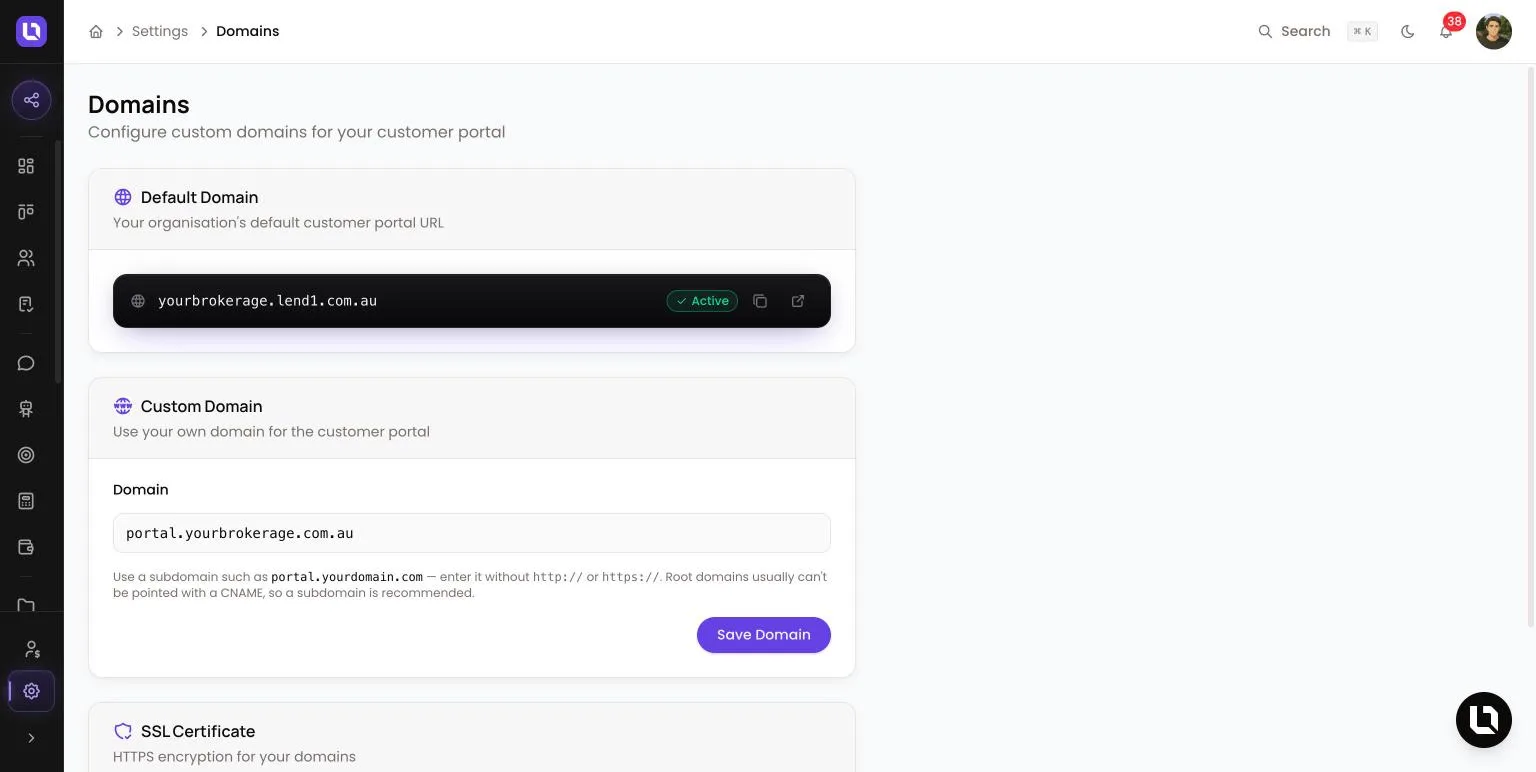
Go to Settings > Domains. The Default Domain card shows the .lend1.com.au address your portal already has. It is always Active and secured with HTTPS.
Step 1: Enter your domain
- Under Custom Domain, complete the address in Domain, for example
portal.yourdomain.com. The field starts withportal.for you. Leave outhttp://andhttps://. - Use a subdomain. The page warns you if you enter a root domain.
- Select Save Domain.
Step 2: Add the DNS record
- A DNS Configuration Required panel appears with one record. At your DNS provider, create a record with the Type (CNAME), Name (your domain) and Value shown. Use the copy button beside Value rather than typing it.
Step 3: Check the status
- Lend1 checks pending domains automatically every two minutes. To check straight away, select Check status now.
- Once the domain verifies, its SSL certificate is issued automatically and the badge changes to Active. The SSL Certificate card shows SSL Certificate Active.
Congratulations! Your client portal now runs on your own domain. New client-facing links, such as onboarding invites, portal login links and form links, use it. Your default domain keeps working, so links you've already sent still open.
Domain statuses
Below is a table of custom domain statuses and what they mean.
| Status | What it means |
|---|---|
| Active | Your domain is verified and HTTPS is on. Copy and open buttons appear beside it. |
| Pending DNS | Lend1 hasn't been able to verify the domain yet. The DNS record and Check status now stay on the page until it does. |
If your domain isn't verifying
- The record is new. Verification can take a few minutes after your DNS record propagates. Select Check status now again later.
- You entered a root domain. A root domain such as
yourdomain.comusually can't take a CNAME. Select Remove Domain and add a subdomain instead. - The domain is already in use. A domain that another Lend1 workspace uses can't be saved.
Remove a custom domain
Select Remove Domain, then confirm in the Remove Custom Domain dialog. The domain and its SSL settings are removed, and your portal is then only accessible via the default domain.