Updated
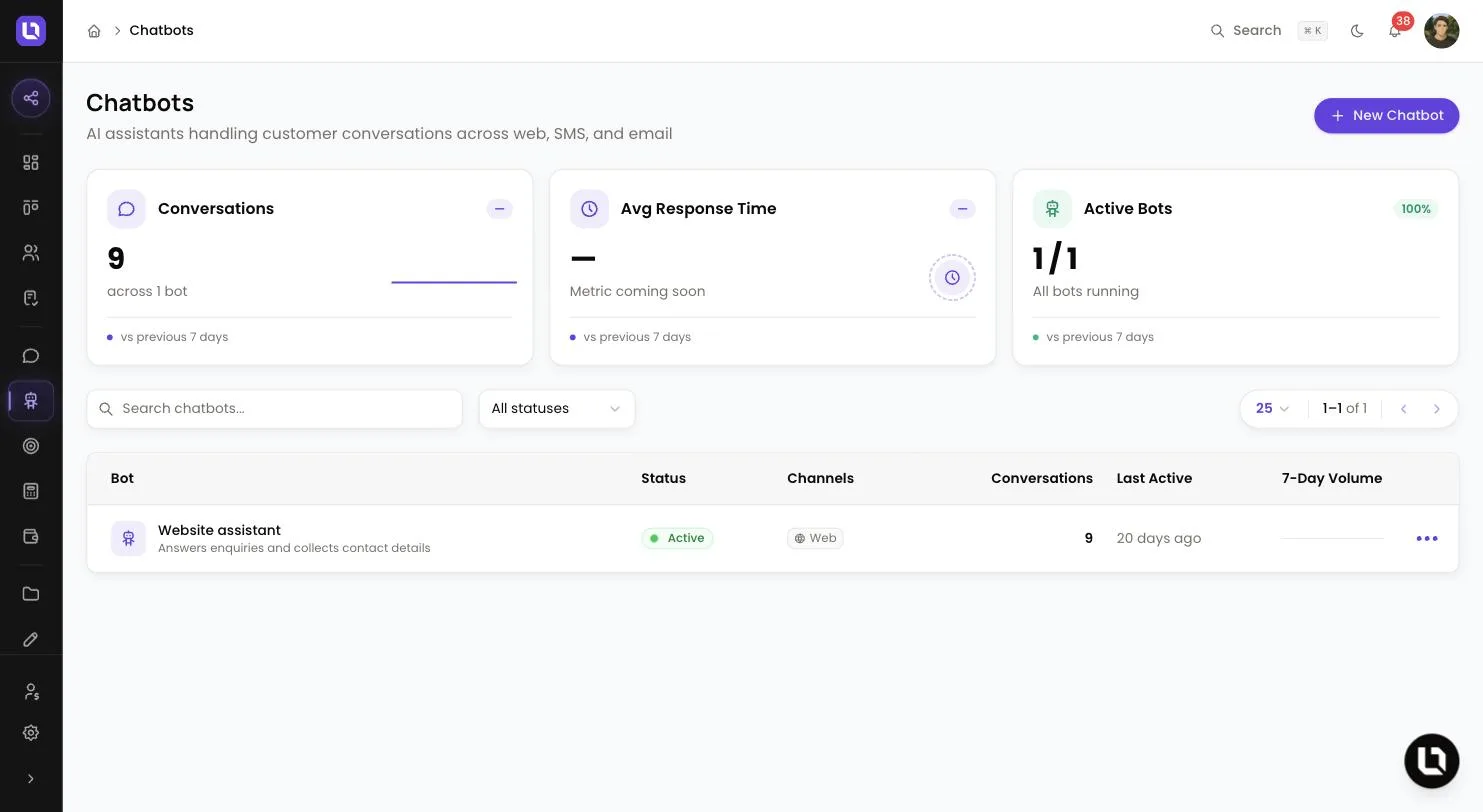
Go to Chatbots in the sidebar.
A chatbot is a chat bubble on your website. It answers visitors from the knowledge base you give it, collects their name and contact details, sends an application or portal login link on request, and hands the chat to your team.
It is not Lend1 AI, your private assistant inside Lend1 that works with your deals and contacts. A chatbot talks to the public and never sees a deal, a document or any account detail. Asked about an application, it sends a portal login link or hands off.
Before you start
- View Chatbots shows Chatbots in the sidebar. Creating, editing, installing and deleting need Manage Chatbots. Activate/Pause Chatbots covers switching one on and off. Reading chats needs View Conversations. An admin grants these under Settings > Roles & Permissions. See Creating custom roles and permissions.
- Chatbots are included in Pro and Enterprise, up to your plan's limit. Settings > Billing shows the Chatbots meter. At the limit, Lend1 shows "You've reached your plan's chatbot limit." See Managing your plan and billing.
- Each AI reply uses AI credits from your workspace's pool.
Create a chatbot
Step 1: Name it
- Select New Chatbot. On the Identity tab, enter a Name. Visitors see it as the chat's title. Description is visible to your team only.
Step 2: Set what it says and collects
Below is a table of settings and what each one does.
| Tab | Setting | What it does |
|---|---|---|
| AI | System prompt | Your instructions for tone and behaviour. Lend1's built-in rules take priority over them. |
| AI | Auto-update CRM | When on, Lend1 reads contact and deal details out of visitors' messages and writes them to the conversation's contact and deal. |
| Knowledge | Add Q&A, Add Document, Add URL | The content the chatbot searches before it answers. For a URL, select Fetch Content, then edit the text if needed. |
| Appearance | Greeting message | Shown in a speech bubble beside the launcher. |
| Appearance | Widget position, Primary color, Avatar URL | Where the launcher sits (Bottom left or Bottom right), its colour, and an image to replace the default chat icon. |
Step 3: Save
- Select Create chatbot. It is saved as Draft.
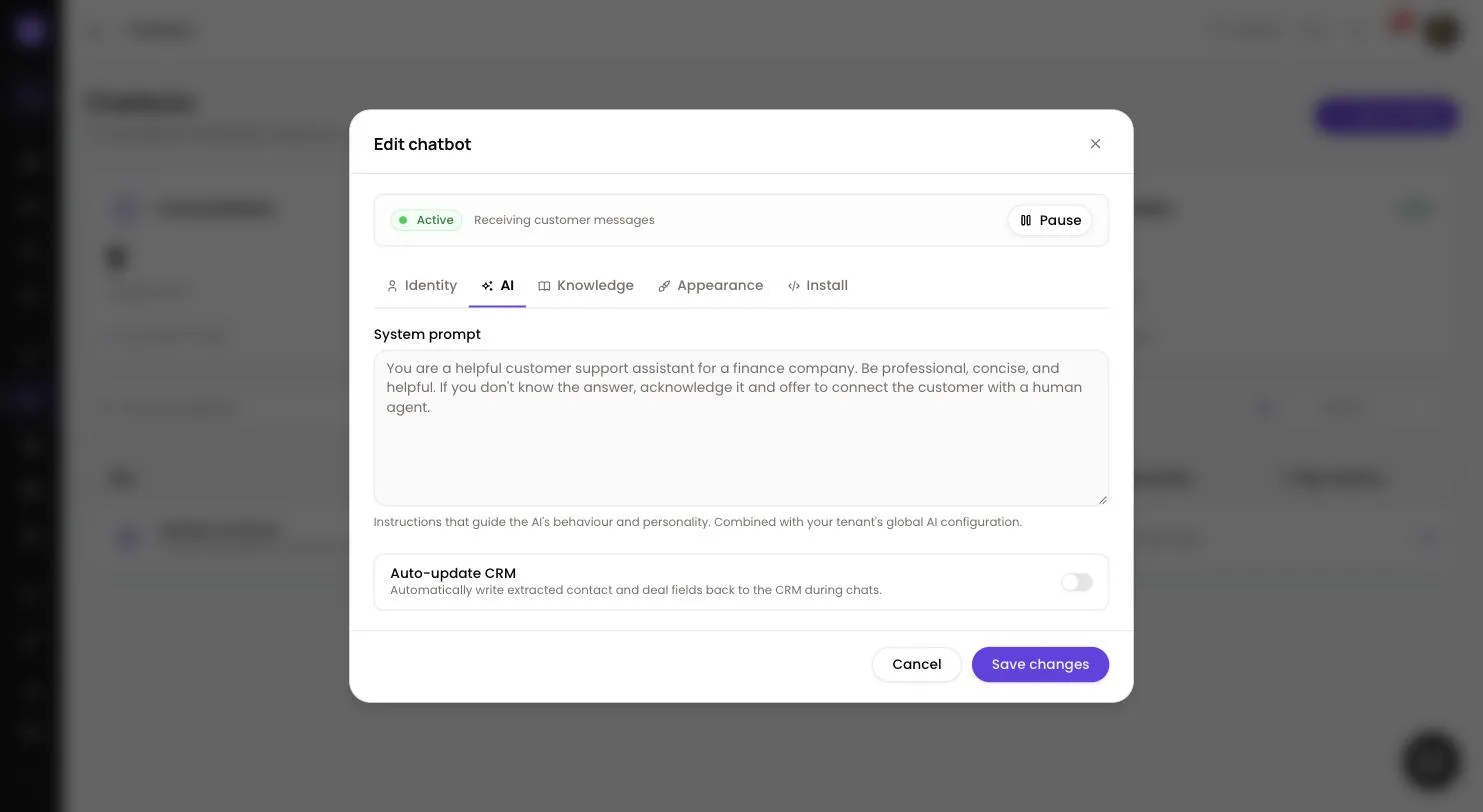
Please note: the built-in rules tell the chatbot to search your knowledge base first, to say so when it has no answer, and never to make up information about loan products, rates, fees or policies.
Script the conversation with Flow Builder (optional)
With no flow, the AI runs the whole chat. To script it, open the chatbot's menu, select Flow Builder, drag nodes from the Node Palette, connect them, then select Save. Once a flow has nodes, it runs instead of the AI.
Below is a table of nodes, in palette order, and what each one does.
| Node | What it does |
|---|---|
| Start | The entry point. One per flow. |
| Message | Sends a message, with up to four buttons. |
| Question | Asks a question and stores the answer. Validation is Any Text, Number, Email Address, Phone Number or Yes/No. |
| AI Response | Writes an AI reply at that point in the flow. |
| API Call | Sends data to an external URL. |
| Condition | Branches to Yes or No. |
| Handoff | Transfers the chat to your team. |
| End | Ends the flow. |
Publish and put it on your website
Step 1: Activate
- Open the chatbot and select Activate. The status changes from Draft to Active.
Step 2: Copy the embed code
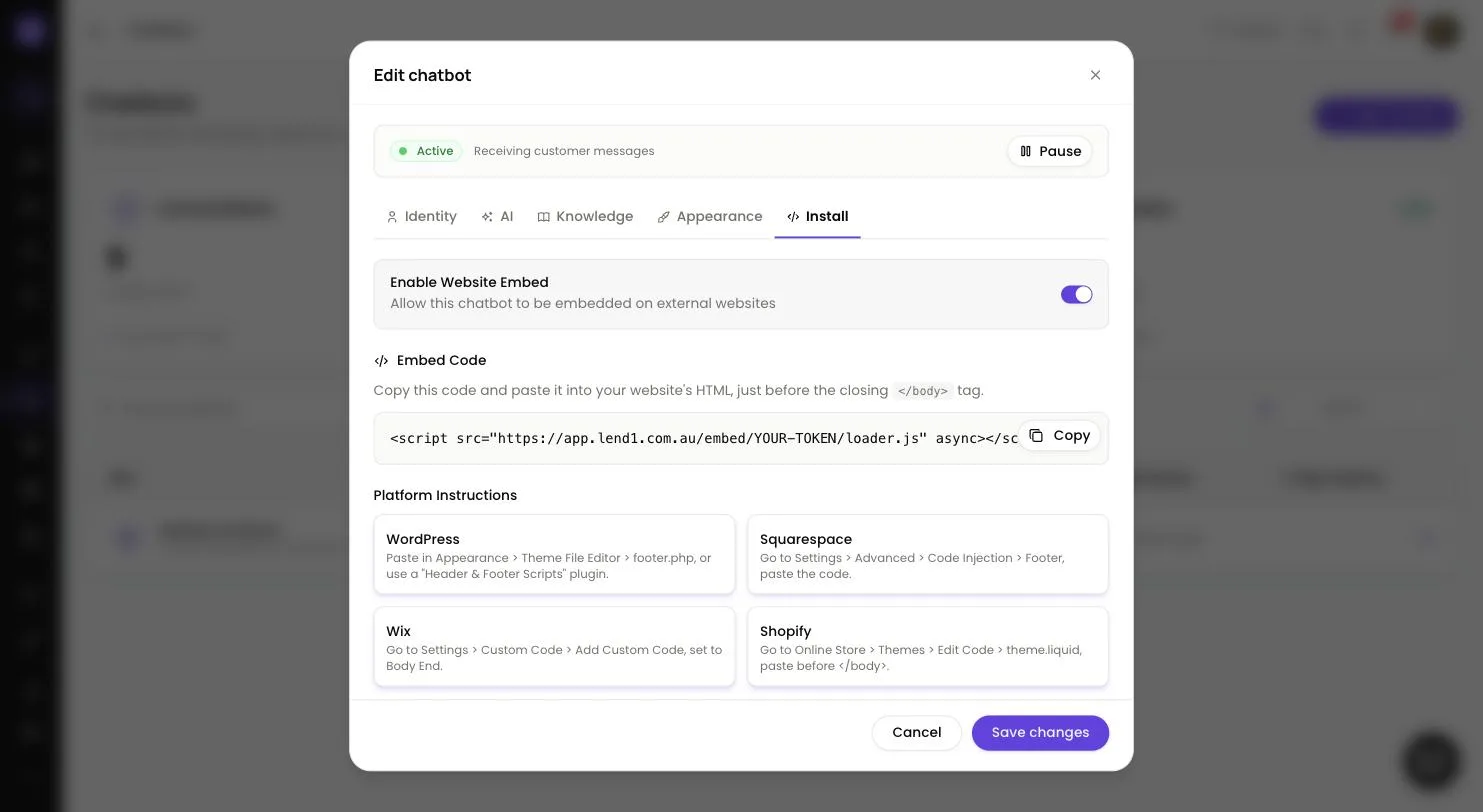
- On the Install tab, switch on Enable Website Embed. Under Embed Code, select Copy and paste the code into your website's HTML, just before the closing
</body>tag.
<script src="https://app.lend1.com.au/embed/YOUR-EMBED-TOKEN/loader.js" async></script>
- Allowed Domains lists the websites that may embed the chatbot. With none added, Lend1 uses your business website from Settings. Once you add a domain, only the listed domains apply, so add your own website as well.
Step 3: Test it
- Live preview on the Appearance tab shows the look only. To test replies, open a page that carries the code and chat as a visitor.
Please note: an Active chatbot also appears to logged-in clients in your portal, even with embedding off.
Congratulations! Your chatbot is live.
What happens in a chat
- After a visitor's first message, the chat shows "Quick one, who am I chatting with?" with Full name, Email and Mobile (optional). They can select Skip.
- Submitting it creates a contact with the source AI Chatbot and links the conversation to it. If the email or phone already belongs to a contact, Lend1 leaves that contact untouched and creates a new one with the name only.
- Asked for an application, the chatbot sends an onboarding invite by email or SMS, in the name of an admin in your workspace. A chat does not create a deal.
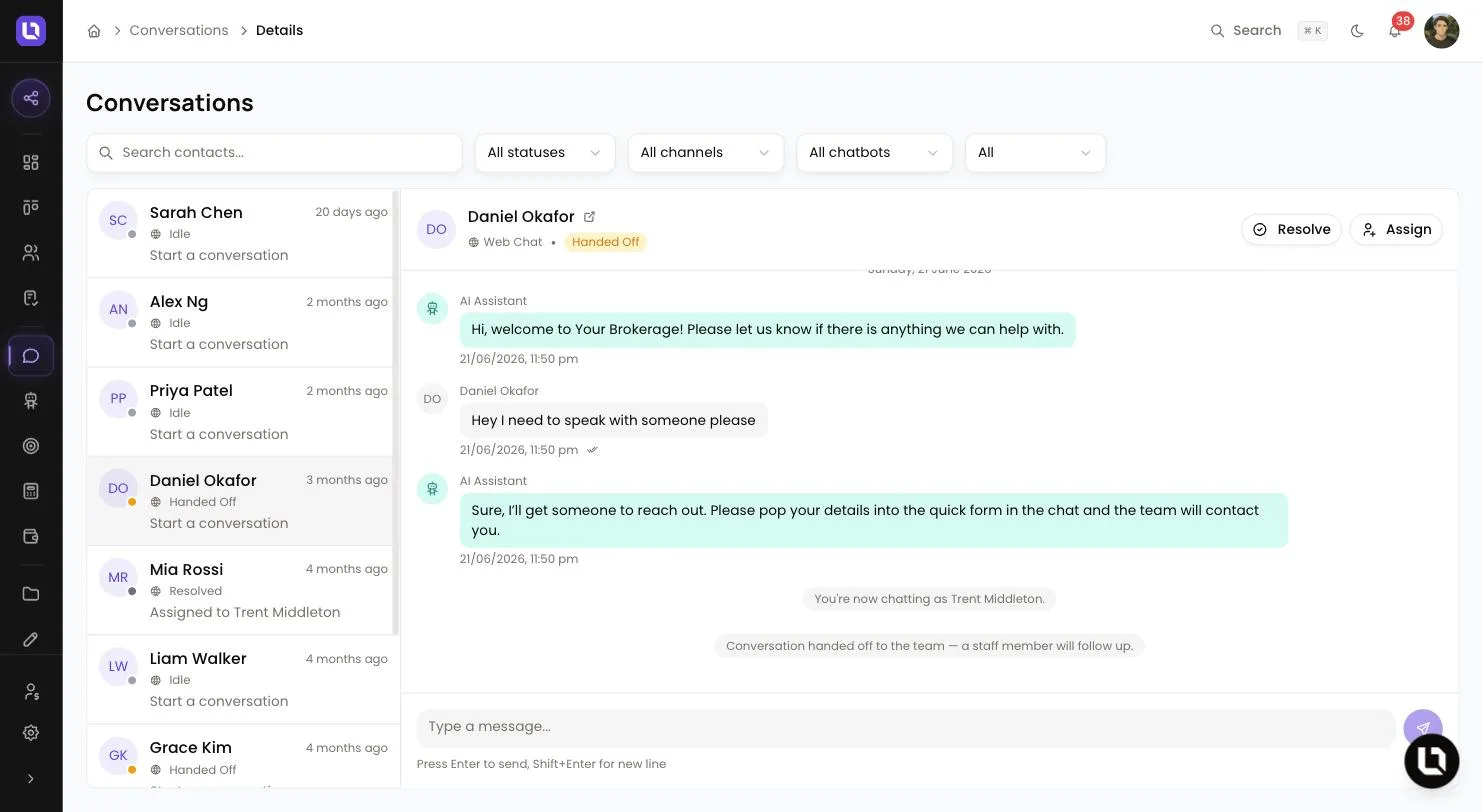
- The chatbot hands off when a visitor asks for a person or it cannot help. An unidentified visitor must complete the details form first. The conversation becomes Handed Off, the chatbot stops replying, and the assigned team member gets an in-app notification and an email. With nobody assigned, they go to everyone with View Conversations.
- Each visitor message can start an automation with the Message Received trigger.
Please note: when your AI credits run out, website chats switch to a fixed script that asks for a name, phone number, email and enquiry, then hands off. The conversation is tagged "Captured while AI credits were exhausted". Flows without an AI Response node keep running.
Read transcripts
Go to Conversations, filter by Chatbot, and open a conversation to read its transcript. Assign, Resolve and Re-open are in its header. If a visitor replies to a resolved chat, it reopens and your team is emailed.
Pause or delete
From a chatbot's menu, Pause stops it replying and Activate restarts it. Delete removes the chatbot and its flow.