Updated
Go to Settings > Team.
This is where you build out your workspace: invite the brokers and support staff who work with you, and decide what each of them can see and do. Every person gets a role, and that role decides which deals, contacts and settings pages they can reach.
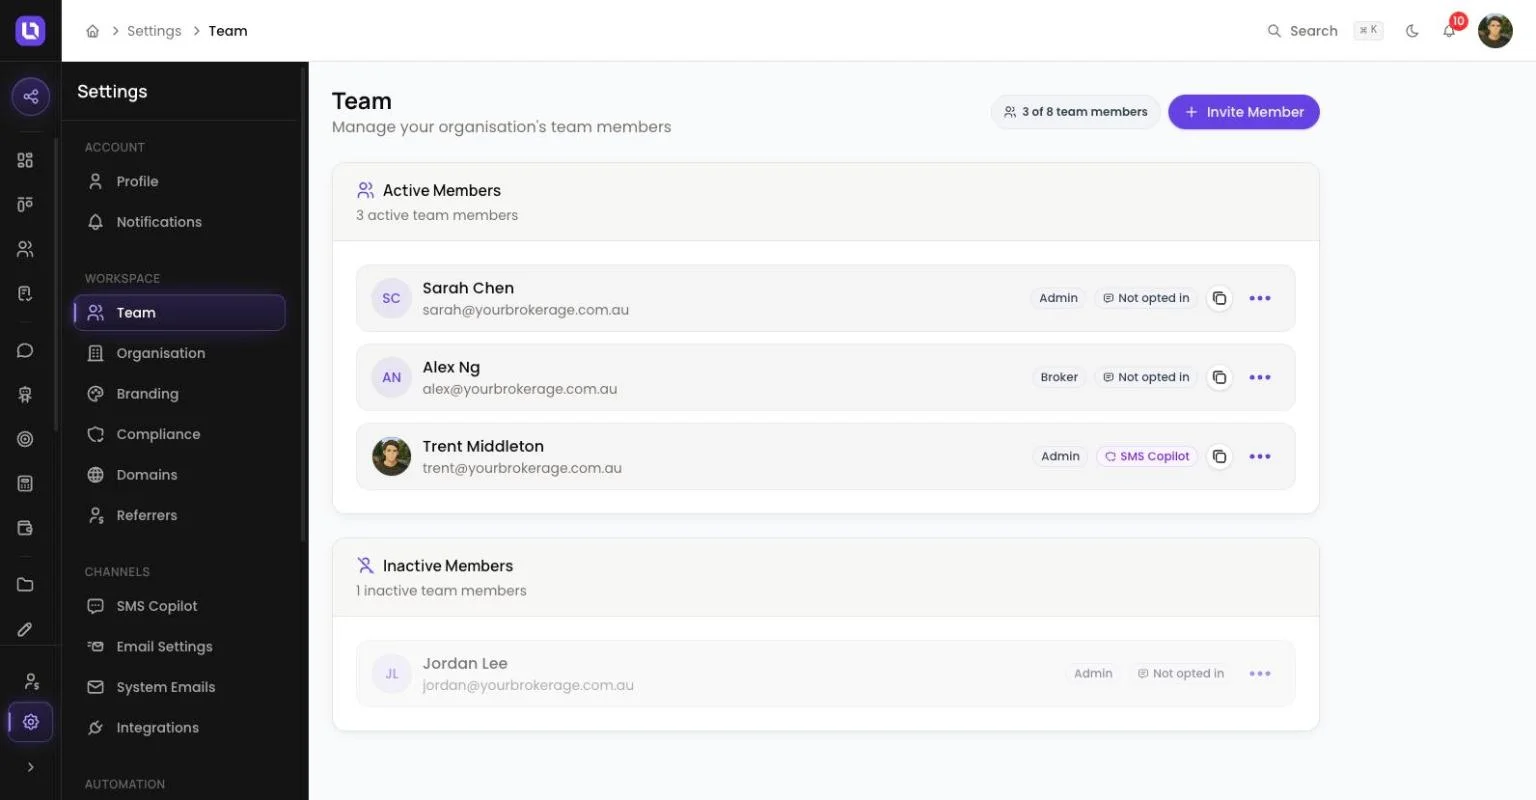
Roles in Lend1
| Role | What they can do |
|---|---|
| Admin | Full access to everything in the workspace, including billing, roles and every deal and contact. |
| Broker | Day-to-day access: their own deals, contacts and tasks. No access to billing, roles or team settings. |
| Support | The same day-to-day access as Broker, plus the deals, contacts and tasks of any brokers they're linked to as a support contact. |
| Custom roles | Built by an admin from the same permission list, for anything Admin, Broker or Support doesn't quite fit (for example a manager who needs to see every deal but not billing). |
Please note: unless a role grants full visibility, a broker only sees the deals and contacts assigned to them. Admin grants full visibility by default; you can grant it to a custom role too.
Invite a team member
Step 1: Open the invite form
- On the Team page, select Invite Member in the top right.
Step 2: Enter their details
- Name: the person's full name.
- Email: the address their invitation and future login will use.
Step 3: Choose a role
- Pick a role from the Role dropdown. Each option shows a short description of what it grants, so you can compare them without leaving the form. If you're not sure which one fits, check the Roles in Lend1 table above.
- If the role you pick doesn't already see every broker's work, a Supports brokers field appears so you can link this person to one or more existing team members straight away. You can leave it empty and set it up later.
Step 4: Send the invite
- Select Send Invitation. Lend1 emails the person a link to accept the invite and set their own password. The link is valid for 7 days.
- Until they accept, they show up on the Team page with a Pending badge next to their role.
Manage an existing member
Open the menu on a team member's row to:
- Edit: change their name, role or linked brokers.
- Resend invitation: send a fresh invite email to anyone still showing as Pending.
- Deactivate: block their login without deleting anything. They move to the Inactive Members list, and you can Reactivate them from the same menu at any time.
- Delete: permanently remove the person. Lend1 warns you first if deleting them would also delete related records, since this can't be undone.
Support staff who work with a broker
A Support role sees only their own work by default, exactly like a Broker. To widen that, link them to a broker: open the invite form or the Edit dialog for that person, and tick the broker in the Supports brokers field. Once linked, they see and work on that broker's deals, contacts, tasks and documents alongside their own. Linking is one-way: a support person sees their linked broker's work, but the broker never sees the support person's other work.
Roles & Permissions
Go to Settings > Roles & Permissions to see every role in your workspace and what each one can do. Admin is locked and can't be edited, but you can adjust the Broker and Support defaults, or select Create Role to build a custom one from the same permission list, covering deals, contacts, documents, automations, integrations and more.
Congratulations! Your team is in Lend1. Next, send your first client an onboarding invite.