Updated
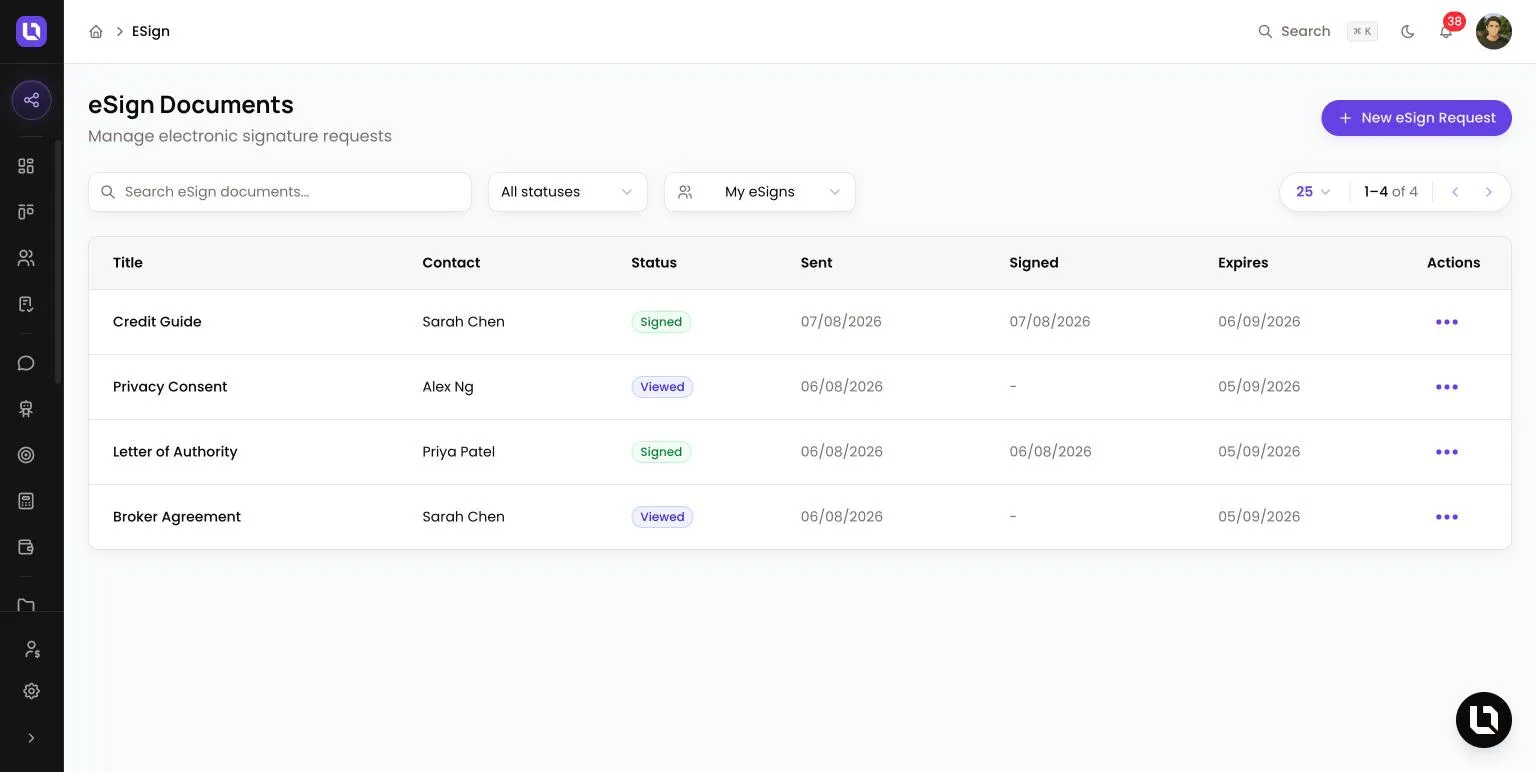
Go to eSign in the sidebar, or open a deal and select its eSign tab.
An eSign request asks one contact to review and sign electronically in your client portal. You give the request a title, choose the signer, optionally attach a document from your compliance library, and Lend1 emails them a secure link. The eSign Documents page lists requests across all your deals, while the eSign tab on a deal shows only the requests for that deal.
Before you start
- The eSign page needs the View Documents permission. If you don't see it in the sidebar, ask an admin to grant it under Settings > Roles & Permissions. See Creating custom roles and permissions.
- You see the requests you sent, plus requests on deals you can access. The Admin role, or a custom role granted View All eSign Requests, also sees requests sent by other team members and gets a filter for All eSigns, My eSigns and each broker.
- The signer must already be a contact in Lend1, and needs an email address to receive the signing link.
- The document your client reads before signing comes from your compliance library under Settings > Compliance. Add it there first: see Setting up your compliance documents.
Send a request from the eSign page
Step 1: Open the form
- Select New eSign Request in the top right of the eSign Documents page.
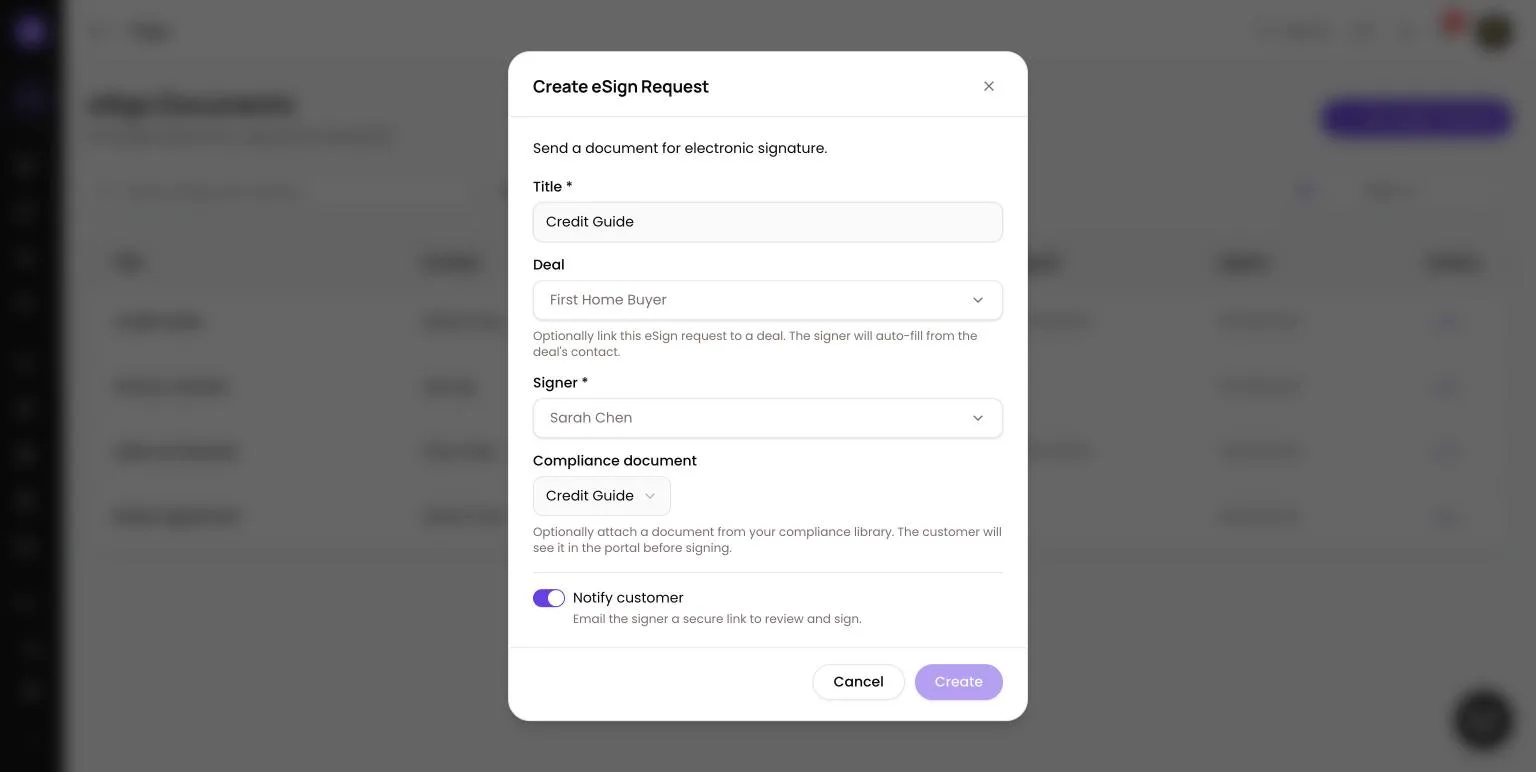
Step 2: Fill in the details
- Title: a name for the request, for example Loan Agreement. Required. Your client sees it in the email subject and at the top of the signing page.
- Deal: optional. Search for an open deal to link the request to it, or leave it on No deal (standalone). When you pick a deal, the signer fills in from the deal's contact.
- Signer: the contact who signs. Required. Search by name, email or phone. Each request has one signer.
- Compliance document: optional. Choose a document from your compliance library, or leave it on No document attached. Your client sees the attached document in the portal before signing.
- Notify customer: on by default. Emails the signer a secure link to review and sign.
Step 3: Create the request
- Select Create. The request is sent straight away: it appears on the list with the status Sent, shows in your client's portal, and gets an expiry date 30 days out in the Expires column.
Please note: if the signer has no email address, the request is still created and Lend1 tells you the email could not be sent. Add an email to the contact, then use Send reminder.
Congratulations! Your client has their signing link.
Send a request from a deal
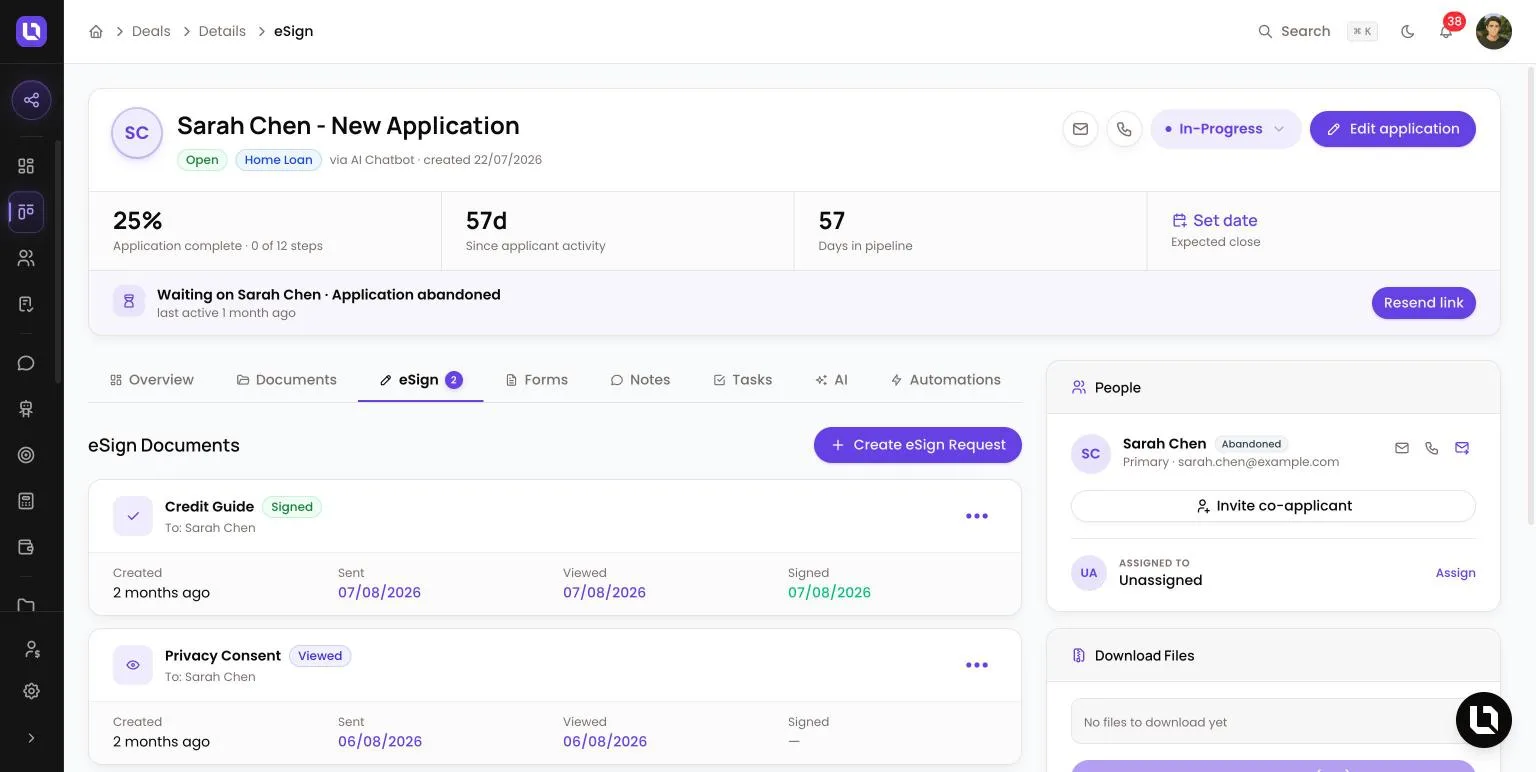
- Open the deal, select the eSign tab, then select Create eSign Request.
- The form is the same, without the Deal field. The Signer is pre-filled with the deal's contact, and you can change it to another contact.
- While a deal has requests waiting on a signature, the eSign tab shows a count of how many are outstanding.
What your client sees
The email has the subject line "[your business name] has a document for you to sign" followed by the title, and a Review & Sign button. The link opens the signing page in their portal without a separate login. A request linked to a deal also appears on their application page.
On the signing page they read the attached document, draw their signature under Your Signature, tick I agree to electronically sign this document, then select Sign Document. They can select Decline to Sign instead, which requires a reason.
Track a request
Below is a table of statuses and what each one means.
| Status | What it means |
|---|---|
| Draft | Created but not sent. Select Send from its menu. |
| Sent | Sent to the client, who hasn't opened it yet. |
| Viewed | The client has opened the signing page. |
| Signed | The client has signed. |
| Declined | The client declined. Their reason shows on the request. |
| Expired | The request can no longer be signed. |
Select a request's title, or View from its menu, to see a timeline of Created, Sent, Viewed and Signed with the date of each. On the eSign Documents page the menu also offers View Deal and View Contact.
While a request is Sent or Viewed:
- Send reminder emails the signer a fresh secure link. It doesn't change the expiry date.
- Cancel, on the deal's eSign tab, asks you to confirm with Cancel Request. The signer can no longer sign, and the request disappears from their portal.
A Draft request on a deal can be removed with Delete.
When your client signs
The request changes to Signed with the signing date. Lend1 sends an in-app notification to the person who sent the request and to the deal's assigned broker, plus an email to each of them unless they've turned off document emails in their notification preferences. A declined request notifies the same people, with the client's reason.
Under Automations, the eSign Signed and eSign Declined triggers start an automation at the same moment, so you can follow up without watching the list.