Updated
Open a deal and select its Documents tab, or go to Documents in the sidebar.
Every uploaded document carries a status, and Pending means someone on your team still has to look at it. This article starts where a client has uploaded something. Building the request list is covered in Requesting and collecting client documents.
Before you start
- The Documents page and a deal's Documents tab open for any role holding a permission in the Documents group: View Documents, Upload Documents, Approve/Reject Documents or Delete Documents. The Admin role holds them all. The default Broker and Support roles hold the first three.
- You see documents on the deals you can access. View All Documents adds deals assigned to other people.
Find documents waiting for review
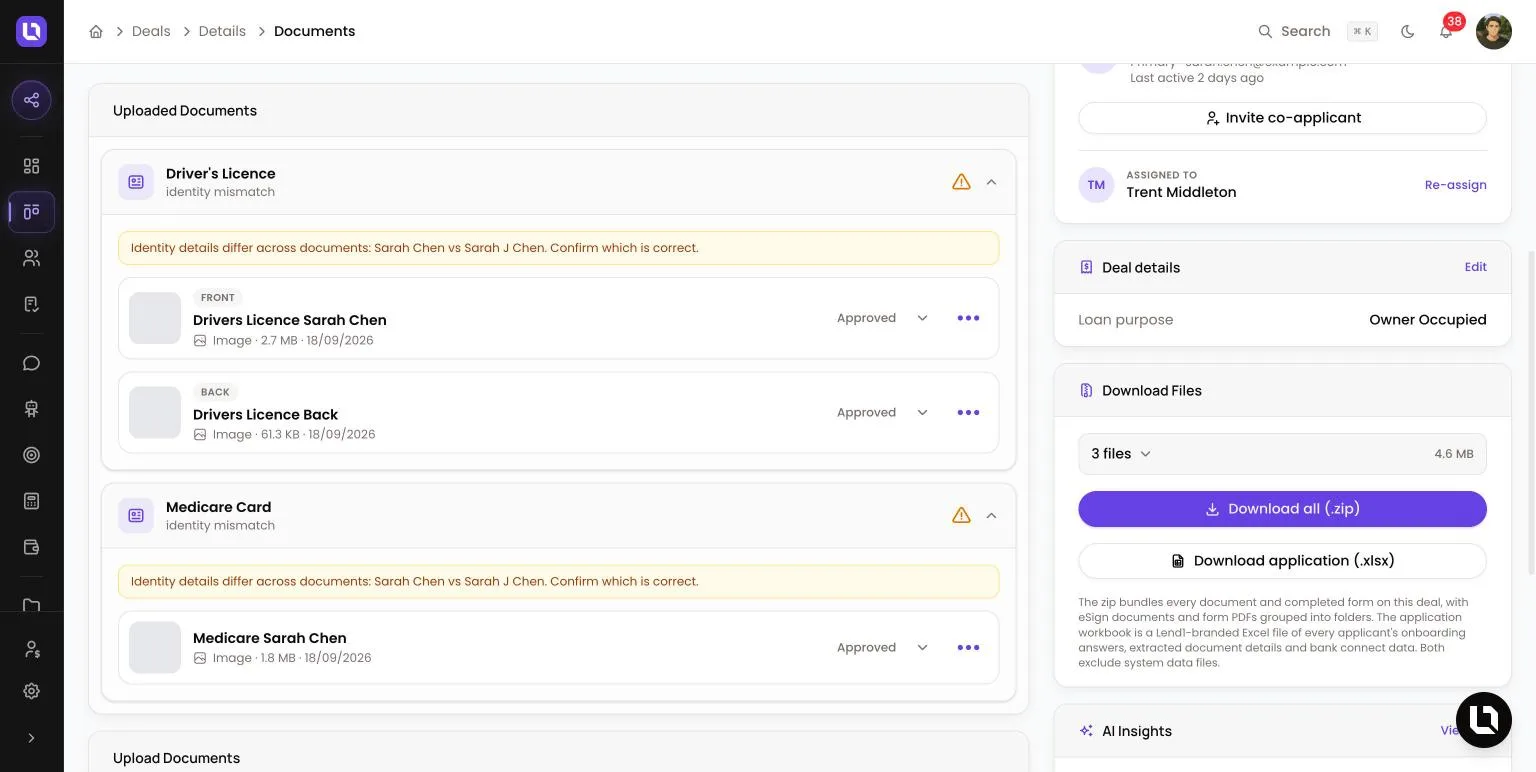
- On a deal. The number on the Documents tab counts pending and rejected documents plus requested items not yet uploaded. When an applicant has documents waiting, the deal header shows Review documents, which opens the tab. Under Uploaded Documents, a pending document has an amber border and an Approve button.
- Across all deals. On the Documents page, set the All statuses filter to Pending.
Please note: Lend1 AI reads each upload first. When it is confident about the document and every detail in it, the document is approved automatically. The bar is the Document Auto-Apply Threshold under Settings > AI Configuration > Document Extraction (0.90 unless an admin has changed it).
Review a document
Step 1: Open the file
- On a deal, select the document's thumbnail. On the Documents page, select View in the row's menu and move through the list with Prev and Next.
Step 2: Check what Lend1 AI read
- On a deal, select the row to open Extracted data: each detail the AI read, with a confidence score. Use the edit button beside a value to correct it. Reading a document uses your workspace's AI credits.
Step 3: Decide
- Select Approve or Reject. Both appear only while the document is Pending, and a review is final: a document can't be moved back to Pending.
Approve a document
Select Approve. The status changes to Approved, in your client's portal too, and the approval is recorded in the document's History. Your client is not emailed.
Reject a document and what your client is told
Step 1: Give a reason
- Select Reject in the row's menu or in the preview. Enter a Reason of up to 1,000 characters. It is required, and your client reads it word for word.
Step 2: Choose whether to re-request it
- Request a replacement is on by default. If the document answered a request, rejecting it always re-opens that request. If the client uploaded it unprompted, the switch adds a new required item to their outstanding list. It sends no extra email.
Step 3: Select Reject
- The deal's primary contact, if they have an email address, receives the Document Rejected email, subject "Action required: Document needs to be resubmitted". It quotes your reason and carries an Upload Document button that signs them in to the deal in their portal. You can edit it under Settings > System Emails.
- The rejected file shows your reason in their portal: see What your client sees in the client portal.
Please note: rejecting from the Documents page has no Request a replacement switch.
<!-- screenshot pending: deal-reject-document-dialog.webp (Reject Document dialog on a deal with a Reason typed in and the Request a replacement switch turned on) -->Document statuses
Below is a table of statuses and what moves a document into each one.
| Status | What moves a document into it |
|---|---|
| Pending | Every upload starts here, from a client or from your team. |
| Approved | You select Approve, or Lend1 AI approves it automatically. Documents Lend1 generates itself, such as an application export, arrive approved. |
| Rejected | You select Reject and give a reason. |
Upload a document on your client's behalf
When an applicant is on a document step of their application, the deal header offers Upload for them, which opens the Documents tab, and Send reminder, which emails them a reminder to continue.
- Select Upload on a requested item, or an Upload document slot under an applicant's name to record the file against that person.
- Upload Document in the tab's menu and the Upload Documents box add any other file: PDF, JPG, PNG, DOC, DOCX, XLS or XLSX, up to 20MB.
- Your upload starts as Pending. Once Lend1 AI has worked out its type, it is matched to an outstanding request of the same type.
Rename or recategorise
Select Rename in the row's menu and change the Document name, the Category, or both.
Please note: a name you set by hand is kept. Auto-rename and Re-analyse with AI skip that document from then on. See Automatic document naming with Doc Renamer.
Download files
- One file: select Download in the row's menu or in the viewer. Each download is added to the document's History.
- The whole deal: in the Download Files card in the deal sidebar, select Download all (.zip). The zip holds the deal's documents whatever their status, plus completed form submissions as PDFs, and is recorded in the audit log.
Delete a document
On a deal, select Delete in the row's menu and confirm. The stored file is removed, the document leaves your client's portal, and it cannot be undone.
How you are notified
Each document added to a deal sends an in-app notification, with no email, to the deal's assigned broker and their active support staff, or to everyone who can view all deals when the deal is unassigned. It belongs to the Document Activity category in Choosing your notifications.