Updated
Go to Contacts in the sidebar.
A contact is one person or company in your workspace, and every deal and co-borrower hangs off one. Each contact has an owner, and ownership decides who else on your team can see the record.
Before you start
- Contacts appears in the sidebar for roles with View Contacts. Adding needs Create Contacts, editing needs Edit Contacts, deleting needs Delete Contacts and changing an owner needs Assign Contacts.
- The Admin role has full access. The default Broker and Support roles hold every permission above except Delete Contacts, and neither holds View All Contacts. An admin can change this under Settings > Roles & Permissions. See Creating custom roles and permissions.
The contacts list
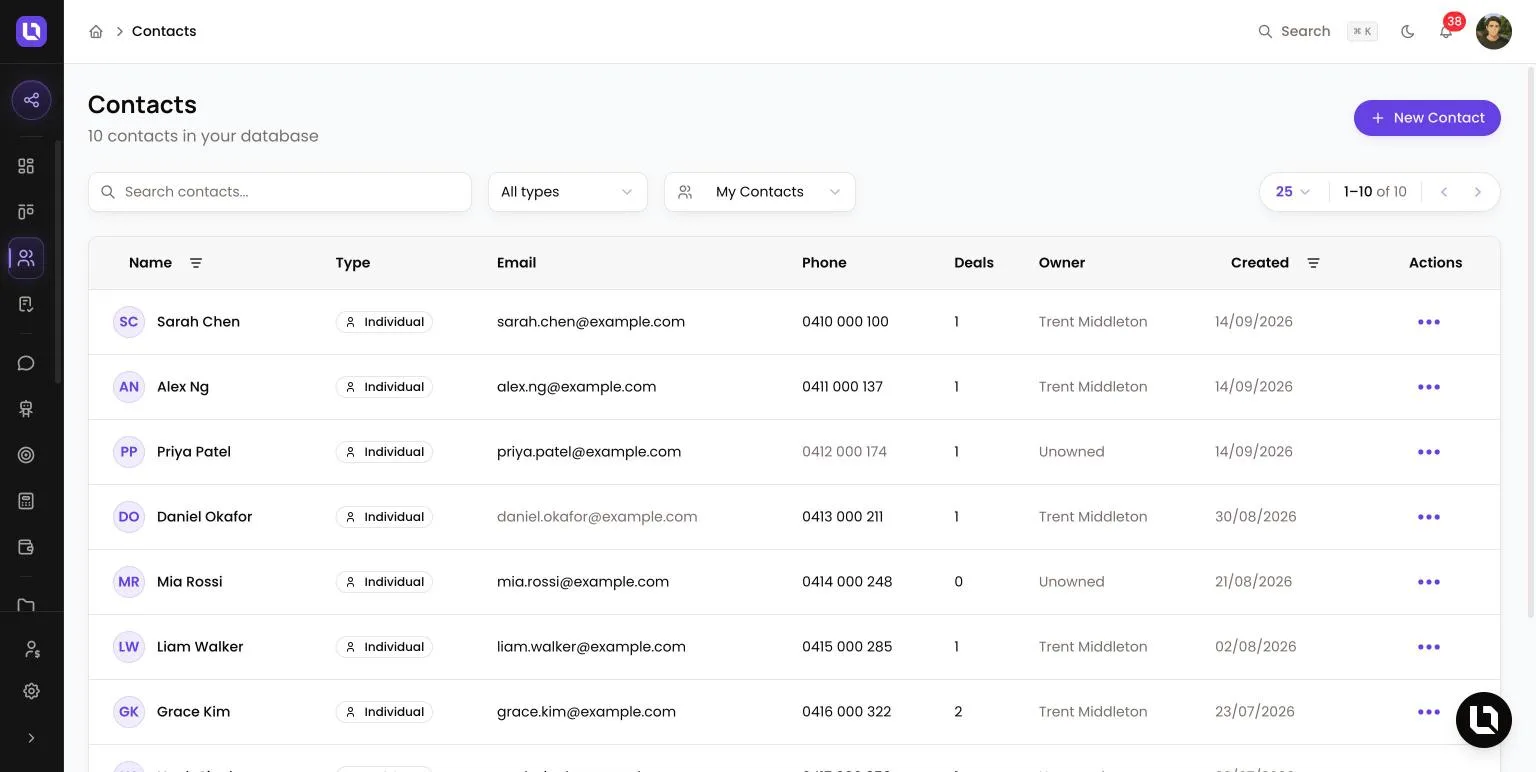
The table shows Name, Type, Email, Phone, Deals, Owner, Created and Actions, newest contact first. A contact with no owner shows Unowned.
- Search contacts... searches names, company, email, phone and mobile. The filter beside it narrows the list to Individual or Company.
- The Actions menu holds View Details, Change Owner and Delete. Delete asks you to confirm in a Delete Contact dialog.
Who can see a contact
Without View All Contacts you see the contacts you own, plus any contact on a deal you can see, whether they are the primary applicant or a co-borrower. Support staff linked to a broker also see that broker's contacts.
With View All Contacts, or the Admin role, you see every contact and get an owner filter: All Contacts, My Contacts, Unowned, then each active team member under Brokers. It opens on My Contacts: the contacts you own plus the contacts on deals assigned to you.
Add a contact
Step 1: Open the form
- Select New Contact in the top right.
Step 2: Fill in the details
- Contact Type: starts on Individual.
- Owner: shows if you hold Assign Contacts. It starts on you.
- First Name, Last Name and Email: required.
- Phone, Mobile and the Address fields: optional.
Step 3: Save
- Select Create Contact.
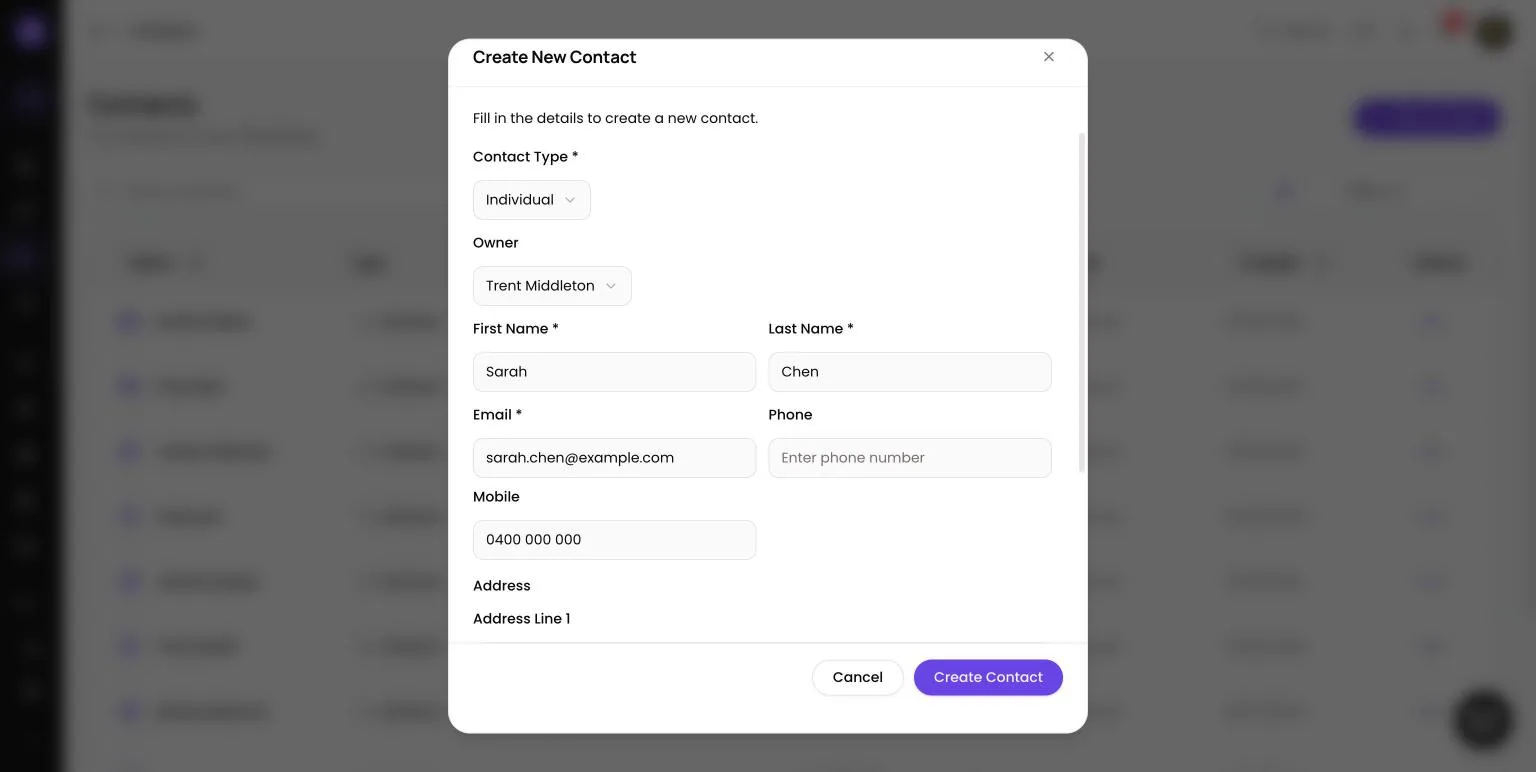
Please note: an email can belong to only one contact in your workspace. If it is taken, Lend1 shows "A contact with this email already exists." and Create Contact stays disabled. A staff login's email is refused too, so use the client's personal address.
Congratulations! The contact is on your list, with a client portal account created for them automatically.
The contact record
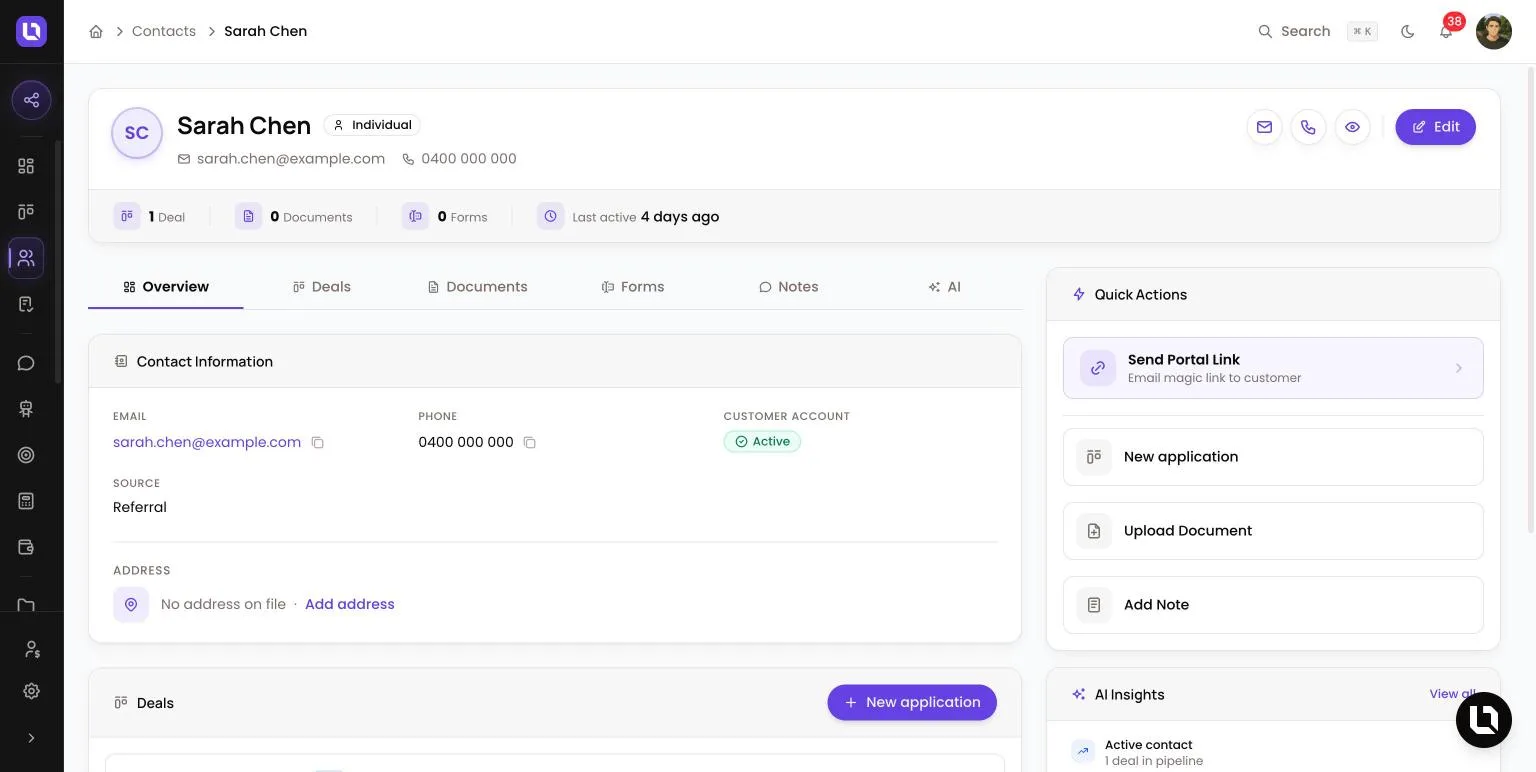
Select a name to open the record. The header has Send email and Call shortcuts and Edit.
Below is a table of tabs and what each one is for.
| Tab | What it is for |
|---|---|
| Overview | Contact Information (including Customer Account, which reads Active or No portal access), the contact's Deals and Recent Activity. |
| Deals | Deals where this contact is the primary applicant. |
| Documents | Documents held for the contact. |
| Forms | The contact's form submissions. |
| Notes | Notes on the contact. |
| AI | AI insights and data extracted from the contact's documents. |
The panel on the right holds Quick Actions (Send Portal Link, New application, Upload Document, Add Note), Open Tasks, AI Insights and Record Details. Send Portal Link sends the client a secure portal link by Email or SMS.
Change a contact's owner
- On the record, use the Owner dropdown in Record Details. It saves as soon as you choose.
- From the list, select Change Owner in the Actions menu, set Owner and select Update Contact.
Without View All Contacts you can pass a contact only to yourself or a broker you support. Unowned is offered only to people who can see all contacts.
Please note: changing the owner does not reassign the contact's deals. Use Re-assign on each deal for that.
Co-borrowers
There is no co-borrower control on the contact record. Co-borrowers are added from the deal: the People card labels them Co-borrower, while the buttons read Invite co-applicant and Co-applicants. Each co-borrower is a contact with their own record here. You can attach only contacts you can see, and a deal where someone is a co-borrower does not appear on that person's Deals tab. The steps are in Working in a deal file.
Import a client list
Step 1: Open the importer
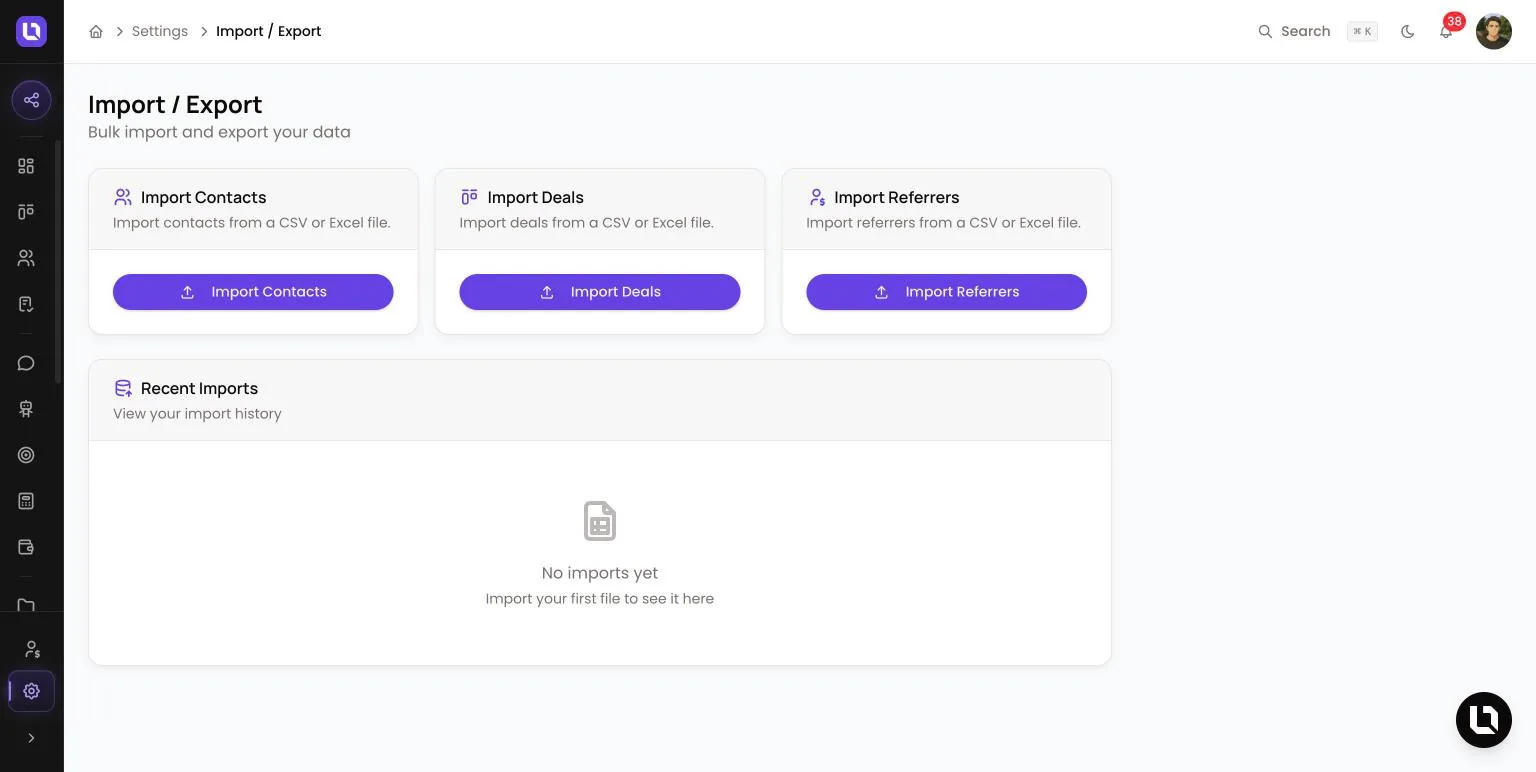
- Go to Settings > Import / Export (it needs Create Contacts) and select Import Contacts.
Step 2: Upload your file
- Add a CSV or Excel file, up to 10MB.
Step 3: Map your columns
- Lend1 matches your headers where it can. For each File Column, choose a field under Maps To, or -- Skip --. You can map name, email, phone, mobile, company and address columns. Only Email must be mapped.
- Select Preview.
Step 4: Check and start
- Review the first 5 rows, then select Start Import. Import Complete reports Created, Updated, Skipped and Errors.
Please note: a row whose email matches an existing contact updates that contact with the non-empty values from your file. New contacts are owned by whoever ran the import. A row without a valid email is reported as an error.
Recent Imports lists your own imports, and admins see everyone's. The page holds import tools and this history only.