Updated
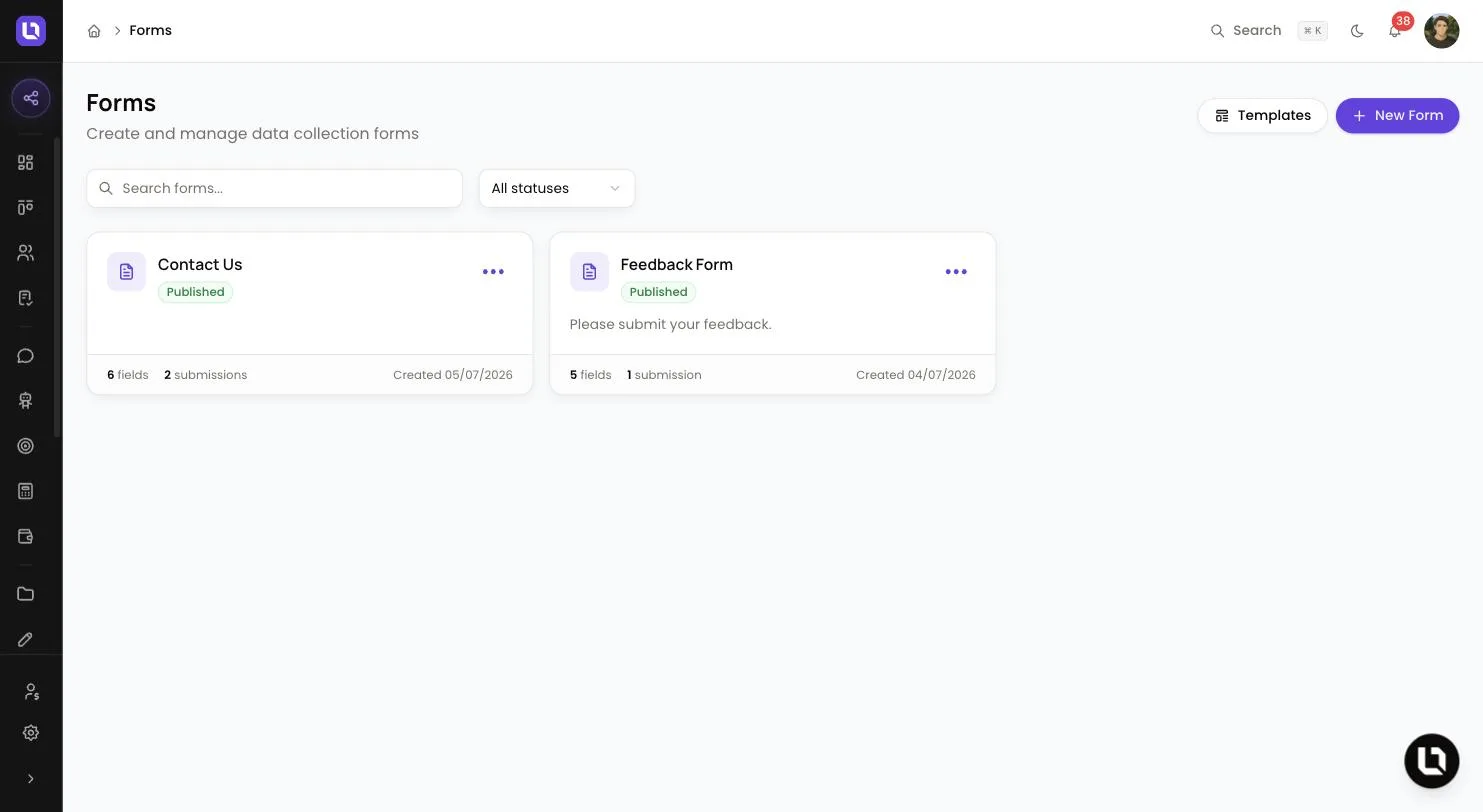
Go to Forms in the sidebar.
A form collects answers from a client outside the main application. You build it from field types, publish it, then share it as a hosted page, embed it on your website or assign it to a client on a deal. Fields can write straight into the contact and deal records.
Before you start
- View Forms shows Forms in the sidebar. Building, publishing and sharing need Manage Forms. Reading submissions needs View Form Submissions. An admin grants these under Settings > Roles & Permissions. See Creating custom roles and permissions.
Build a form
Step 1: Create the form
- Select New Form. Lend1 creates a draft called "Untitled Form" and opens the builder. To start from a pre-built form, select Templates, then Use Template.
- Type over the name at the top. Changes save automatically.
Step 2: Add fields
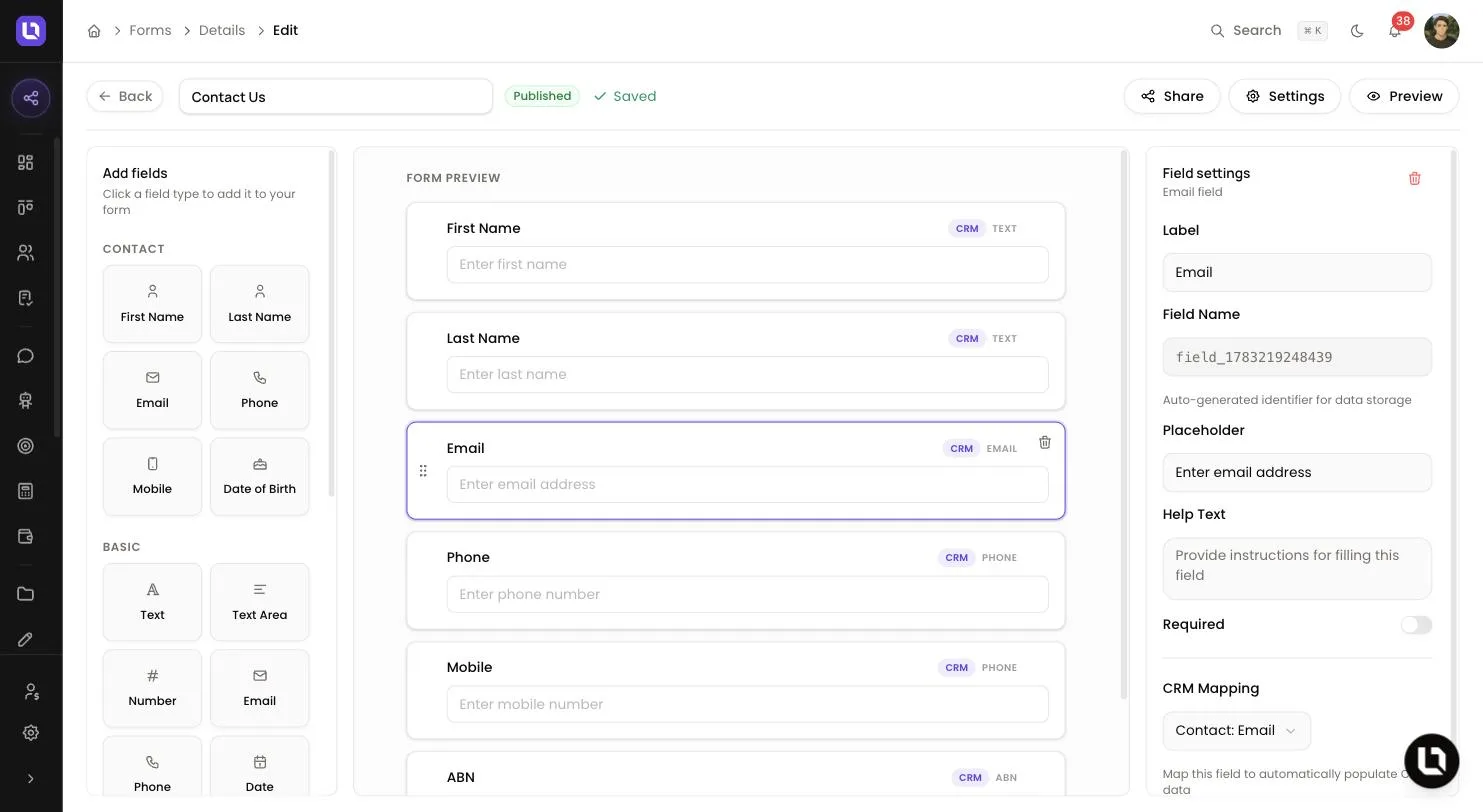
- Under Add fields on the left, select a field type. It lands at the bottom of the Form preview in the centre. Drag fields to reorder them.
Step 3: Configure each field
- Select a field in the preview to open Field settings on the right.
- Label: the question your client reads. Placeholder and Help Text are optional guidance.
- Required: switch on to make an answer mandatory.
- Options: shown for Dropdown, Multi-Select, Checkbox and Radio. Select Add for each choice.
- CRM Mapping: pick a contact or deal field, such as Contact: Email or Deal: Value, and the answer fills that record.
Step 4: Set the form's wording
- Select Settings to open Form Settings: Show form title, Description, Submit button text, Success message and Redirect URL. Select Save Changes.
- Select Preview to see the form as your client will.
Field types
Below is a table of field types, in palette order, and what each one is for.
| Field | Group | What it is for |
|---|---|---|
| First Name, Last Name, Email, Phone, Mobile, Date of Birth | Contact | Already mapped to the matching contact field. |
| Text | Basic | A single line of text. |
| Text Area | Basic | A longer answer. |
| Number | Basic | A number. |
| Basic | An email address. | |
| Phone | Basic | A phone number. |
| Date | Basic | A date as DD/MM/YYYY. |
| Dropdown | Choice | One choice from a list. |
| Multi-Select | Choice | Several choices from a list. |
| Checkbox | Choice | A tick box. When required, it must be ticked. |
| Radio | Choice | One choice from visible options. |
| File Upload | Special | An area to drop or select a file. |
| Signature | Special | A pad your client signs on. |
| Address | Special | Street address, suburb, state and postcode. |
| Currency | Special | A dollar amount. |
| ABN | Special | An 11-digit ABN, mapped to the contact. |
| ACN | Special | A 9-digit ACN, mapped to the contact. |
Publish and share
Step 1: Publish
- Select Publish, then confirm in Publish Form. Until then, Share is greyed out.
Step 2: Pick a share method
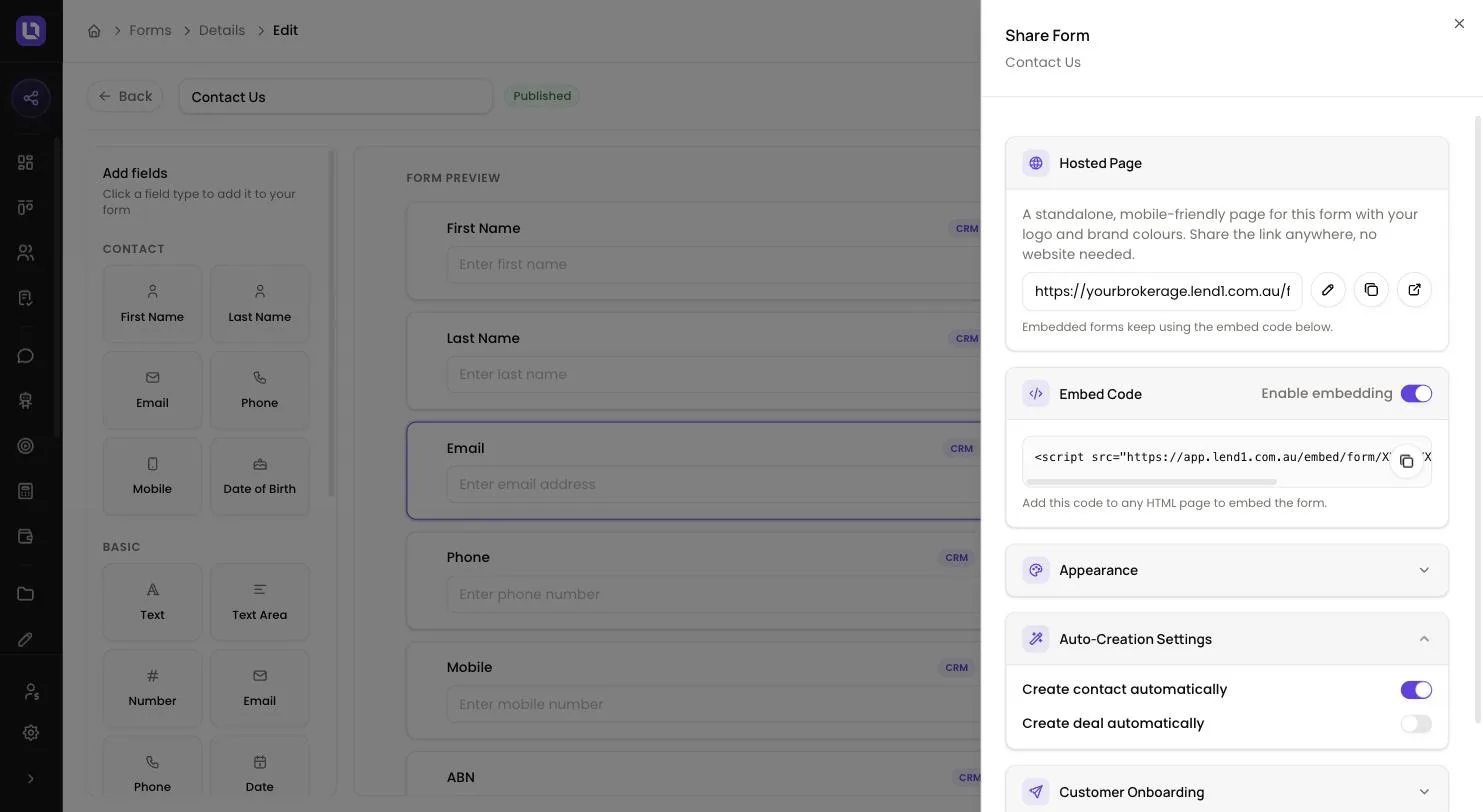
- Select Share to open Share Form.
- Hosted Page: a standalone, mobile-friendly page with your logo and brand colours. Use Copy link, Open in new tab or Edit URL.
- Embed Code: switch on Enable embedding, then Copy code and add it to any HTML page. Under Security, Allowed domains lists the websites that may embed the form. With none added, Lend1 uses your business website from Settings.
Step 3: Decide what a submission creates
- Under Auto-Creation Settings, Create contact automatically needs an email field mapped to the contact's email. A submission that matches an existing contact is linked to it and only fills that contact's blank fields.
- Create deal automatically adds Initial Stage, Deal Type and Assign to. Select Save Changes.
Please note: on a published form you cannot change a field's type. Deleting a field that already has answers moves it to Archived fields, where Restore brings it back. Past submissions keep their answers.
Assign a form to a client on a deal
Step 1: Assign it
- Open the deal, select the Forms tab, then Assign Form.
- Form: pick a published form that is not already on the deal.
- Notify customer: tick it to email the primary contact a secure link to complete the form.
Step 2: Follow progress
- The form appears under Assigned Forms as Not Started, In Progress or Completed. Your client completes it in their portal.
- From the form's menu, select Send reminder, View Submission, Download PDF or Remove. A completed form cannot be removed.
An automation can assign a form too, with the Assign Form action.
Read submissions
- When a form is submitted, Lend1 sends an in-app notification and an email. On a deal, they go to the assigned broker. Otherwise they go to everyone with View Form Submissions.
- Select a form's name on the Forms page. Filter Submissions by All, New, Partial, Complete or Processed.
- From a row's menu, select View submission, Download PDF, Mark as processed or Assign to deal, which links the submission to a deal without sending an email.
- A contact's Forms tab lists that person's submissions under Form Submissions.
Please note: from a form's menu, Archive takes it offline and keeps its submissions, Restore brings it back, Duplicate copies it, and Delete also deletes all of its submissions.
Congratulations! Your form is live. The Form Submitted trigger can start an automation from each submission.