Updated
Go to Settings > Roles & Permissions.
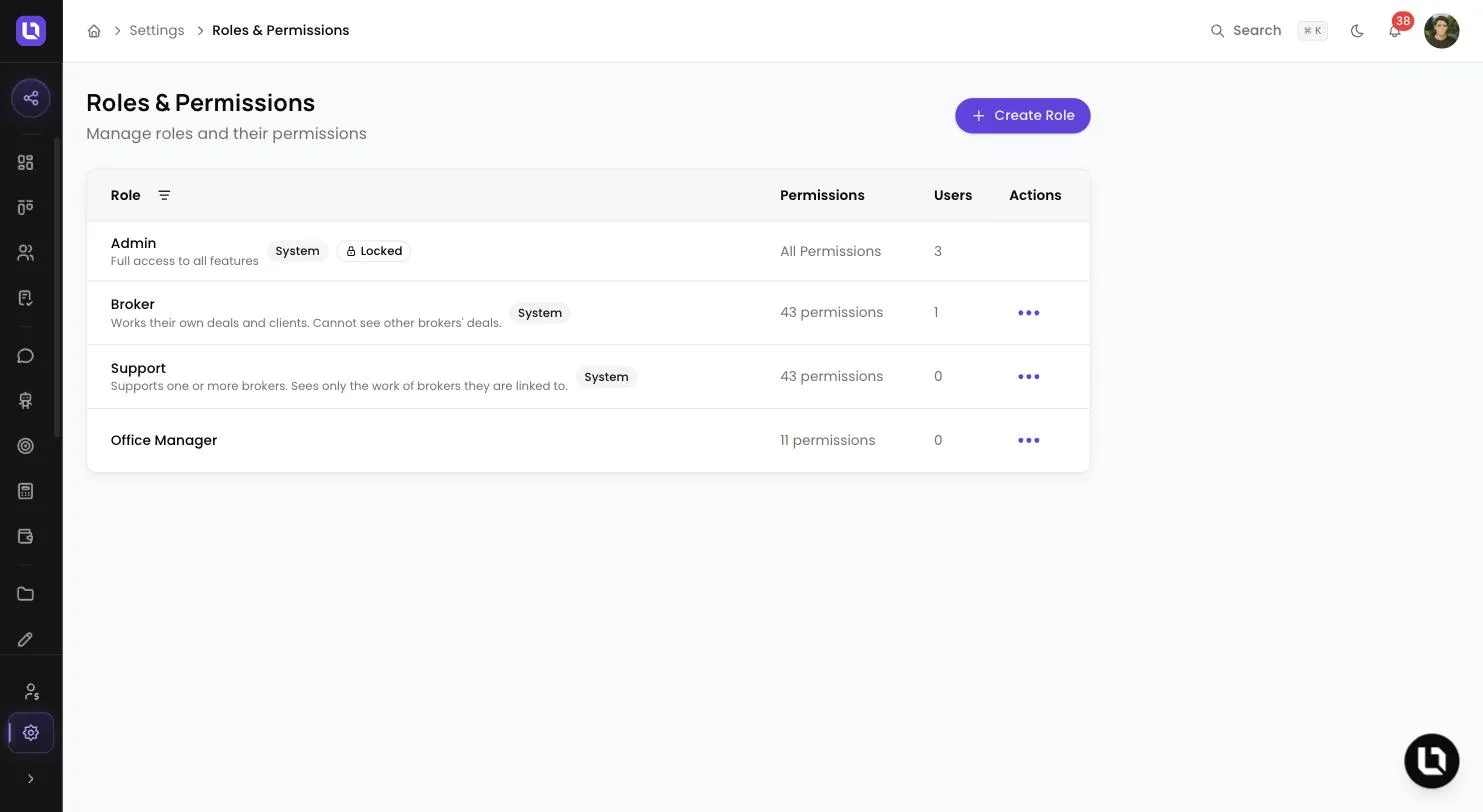
A role is a named set of permissions. Every team member has a role, and the role decides which pages they can open and what they can do there. This page lists every role in your workspace with its Permissions count and how many Users hold it.
Before you start
- You need the Manage Roles permission. Without it, Roles & Permissions doesn't appear in the settings menu. Ask an admin to grant it to your role.
- If you aren't an admin, you can only grant permissions your own role already holds. Saving a role with anything more is refused.
How roles work
Every workspace starts with three roles marked System. Admin is also marked Locked: it always holds All Permissions and can't be edited or deleted. Broker and Support start with the same day-to-day permissions, and you can change what either one holds. System roles can't be renamed or deleted. For how the three compare, see Inviting your team and assigning roles.
Most View permissions cover a person's own work only: records assigned to them, plus the records of any broker they're linked to in the Supports brokers field on the Team page. The matching View All permission, tagged All brokers' data in the list, removes that limit for deals, contacts, tasks, documents, eSign requests, onboarding invites and compliance documents. Conversations are not limited this way: anyone who can view Conversations sees every conversation in the workspace.
Create a custom role
Step 1: Open the form
- Select Create Role in the top right.
Step 2: Name the role
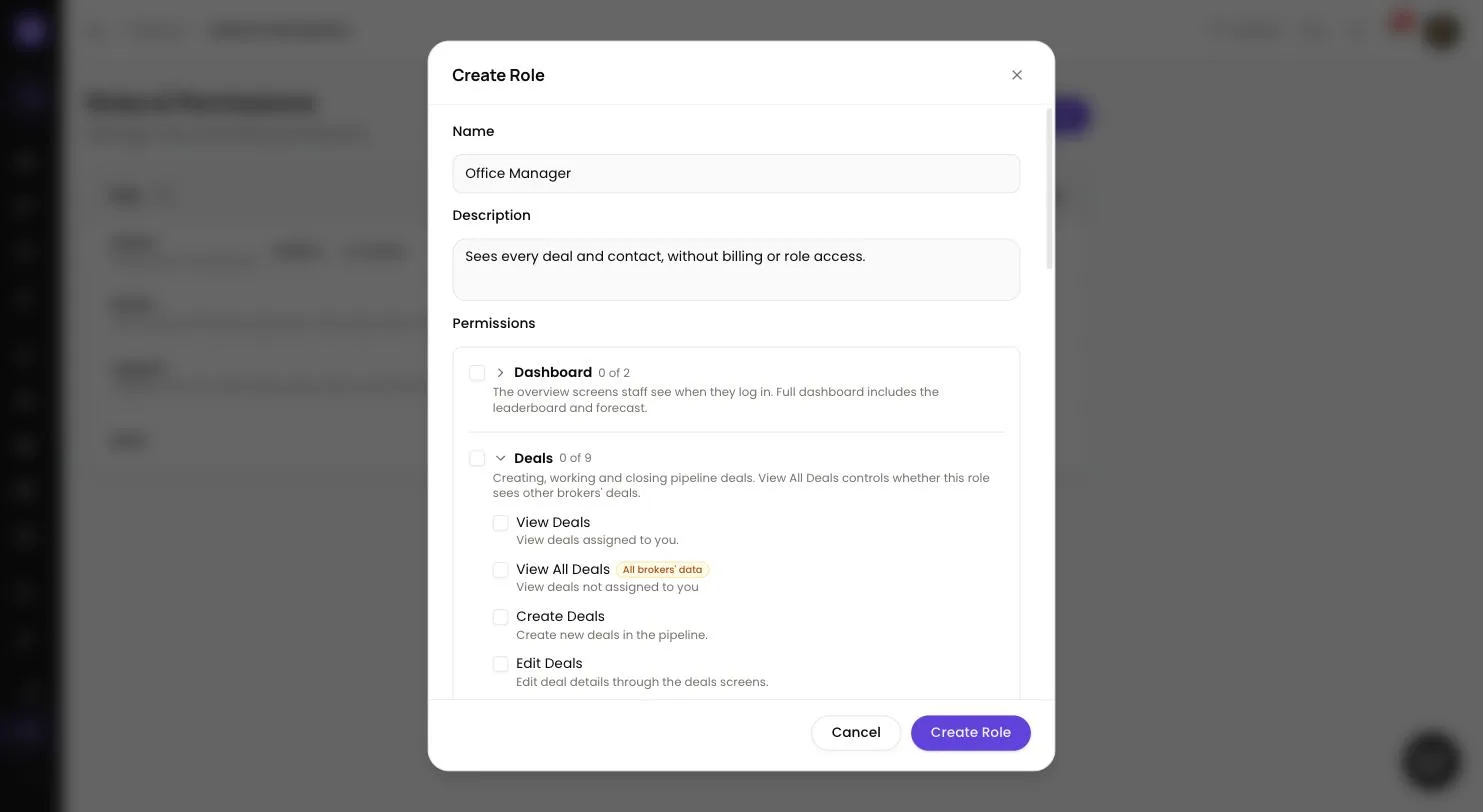
- Name: what the role is called, for example Senior Broker. Two roles can't share a name.
- Description: optional. It shows under the role name in the list.
Step 3: Choose permissions
- Under Permissions, select a group name to expand it. Each permission shows a one-line description, and the counter beside the group name (for example 2 of 9) shows how many are ticked.
- Tick permissions one at a time, or tick the box beside the group name to select the whole group.
- Permissions tagged Destructive delete records. Elevated marks Impersonate Users.
Step 4: Save
- Select Create Role. The role appears in the list and in the Role dropdown on the Team page.
Congratulations! Your custom role is ready. Assign it under Settings > Team by opening Edit on a team member.
Edit or delete a role
- Open the menu on a role's row and select Edit Role, change the permissions, then select Update Role. Lend1 applies the new permission set to everyone in that role as soon as you save.
- To remove a custom role, open the same menu and select Delete, then confirm in the Delete Role dialog. A role that still has team members assigned can't be deleted: move them to another role first. The Users column shows how many people hold each role.
Please note: creating, renaming and deleting a role are each recorded in Settings > Audit Log.
Permission reference
Below are tables of the permissions brokers most often adjust and what each one allows, in the order the form lists them.
Deals
| Permission | What it allows |
|---|---|
| View Deals | See deals assigned to you. |
| View All Deals | See deals assigned to other team members. |
| Create Deals | Add new deals to the pipeline. |
| Edit Deals | Change deal details on the deal screens. |
| Update Deals | Let Lend1 AI update deal fields, including the stage, on your behalf. |
| Assign Deals | Assign deals to team members. |
| Change Deal Stage | Move deals between pipeline stages. |
| Export Deals | Export deal data to a file. |
| Delete Deals | Delete deals from the pipeline. |
Contacts
| Permission | What it allows |
|---|---|
| View Contacts | See contacts assigned to you. |
| View All Contacts | See contacts assigned to other team members. |
| Create Contacts | Add new contact records. |
| Edit Contacts | Change contact details. |
| Assign Contacts | Change which team member owns a contact. |
| Merge Contacts | Merge duplicate contacts into one record. |
| Export Contacts | Export contact data to a file. |
| Delete Contacts | Delete contact records. |
Tasks
| Permission | What it allows |
|---|---|
| View Tasks | See tasks assigned to you, created by you, or on your deals. |
| View All Tasks | See every other task in the workspace. |
| Create Tasks | Add new tasks. |
| Edit Tasks | Change existing tasks. |
| Delete Tasks | Delete tasks. |
Documents
| Permission | What it allows |
|---|---|
| View Documents | See uploaded documents. |
| View All Documents | See documents on deals not assigned to you. |
| View All eSign Requests | See eSign requests sent by other team members. |
| Approve/Reject Documents | Approve or reject uploaded documents. |
| Request Documents from Customers | Request documents from clients, including through Lend1 AI. |
| Upload Documents | Upload documents. |
| Delete Documents | Delete documents. |
Automations
| Permission | What it allows |
|---|---|
| View Automations | See automations. |
| Activate/Pause Automations | Turn automations on and off. |
| Manage Automations | Create and edit automations. |
| Manage Own Automations | Create and edit automations that run on your own deals. |
Integrations
| Permission | What it allows |
|---|---|
| View Integrations | See connected integrations. |
| Connect Own Integrations | Connect your own Connective, Calendly and Google Calendar accounts. |
| Manage Integrations | Connect, configure and disconnect integrations for the workspace. |
Settings
| Permission | What it allows |
|---|---|
| Manage Billing | Manage the subscription plan and billing. |
| Manage Branding | Manage branding, logos and the custom domain. |
| Manage Lead Widget | Manage the public lead capture widget. |
| Manage Pipeline Stages | Manage pipeline stages. |
| Manage Roles | Create and edit roles and permissions. |
| Manage Team | Invite, edit and deactivate team members. |
Other groups
| Group | What it covers |
|---|---|
| Dashboard | Your own dashboard, or the full one with the leaderboard and forecast. |
| Forms | Viewing, building, publishing and sending forms, and processing submissions. |
| Reports | Viewing, building and exporting reports. |
| Conversations | Viewing, replying to and assigning client conversations. |
| Chatbots | Viewing, building and switching chatbots on and off. |
| Landing pages | Viewing, building and publishing landing pages. |
| Calculators | Configuring and publishing client-facing calculators. |
| Planners | Configuring and publishing client-facing planners. |
| AI | Lend1 AI chat and copilot, insights, lead scoring rules, the knowledge base and automation suggestions. |
| Referrers | Viewing and managing referrers, and setting and paying commissions. |
| Onboarding | Viewing, creating, resending and cancelling onboarding invites. |
| Compliance | Viewing and managing compliance documents such as the privacy policy and credit guide. |
| Admin | View Audit Log and Impersonate Users, which shows you the portal as a client sees it. |